Friday, March 27, 2015

Birthday Screen Card


I haven't made a screen card in awhile but had a request for one for a recent class and here is what I came up with.  It is so nice to start using some bright colors again, now if only the weather would start to say spring and summer are coming soon.


The dimensions I used are:
1.  Start with a piece of Card Stock measuring 5 1/2" x 11"
2.  On the long side score your Card Stock at 2 3/4", 5 1/2", 8 1/4"
3.  Fold your Card Stock on the score lines to create your panel.
4.  For the legs - take your Decorative Label Punch and center in between each panel and punch.
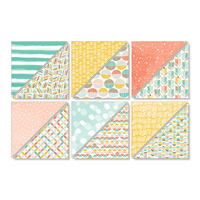
5. Decorate your panels using the dimensions:  2 1/2" x 4 1/4" and 2 1/4" x 4"


As you can see I used a couple different stamp sets, coordinating Washi Tape and  made sure to leave enough space on the last panel to keep room to write my birthday wishes.  Screen cards are really easy to make and are fun to decorate too.


The following were used:

Wednesday, March 25, 2015

Timeless Talk


I like to use the materials I already had cut out for my classes and make a different card with the leftover product.  I took my Best Year Ever Designer Series Paper and turned it to the other side an since it already coordinated with my cut card stock layers I just needed to change the images I stamped.
 
After I stamped my gramophone in Soft Suede Ink I stamped my sentiment onto another piece of Whisper White Card Stock and cut it out and placed it on with Dimensionals.  I added some 7/8" Cotton Ribbon to finish my card.   
 
Once you find a layout you like it is easy to cut all your materials at one time and you can just change a few things such as your stamps and embellishments to have a nice supply of cards on hand.  I always try to make at least two cards at a time because when you cut your 8 1/2" x 11" Card Stock in half you already have the base for two cards.  Just cut all of your layers at the same time and make a second card and save for another time.


The following were used:

Friday, March 20, 2015

Craft Fair Weekend

I  am busy getting everything ready for a Craft Fair tomorrow at Northampton  Community College in Bethlehem, PA.  If you are in the area and have some free time Saturday I would love to see you there.  Time is from 9 AM - 3 PM.  There is a small admission fee to attend, but they have so many great handmade crafters that I think it is worth it.  Proceeds from the ticket sales and vendor table fees go to support their Alumni Foundation.

In the meantime here are some prior posts showing you just a sample of some of the products I will have for sale.


This is just a small sample of the products I will have for sale and I hope to see you there!


Thursday, March 19, 2015

B.Y.O.P.


When I first saw the name of the stamp set "B.Y.O.P." I didn't know what the initials stood for until I read the stamps in the seat.  They stand for "Buy your own present", which is great to attach to a gift card, but there are 17 stamps in this Photopolymer Stamp Set that has sentiments for graduation, baby, wedding, birthday, thank you and congratulations so you can use it for a lot of occasions.
 
I stamped my sentiment using Bermuda Bay and Calypso Coral Ink which coordinated with my card stock and Designer Paper.  I also cut a few banners with the Birthday Bash Specialty Designer Series Paper using my Big Shot and a Banner Framelit.  I strung them up with Bermuda Bay Baker's Twine and placed them onto my card using Dimensionals.  I thought the bottom of the card needed a bit more so I layered some Bermuda Bay 1/8" Taffeta Ribbon in a criss cross pattern and used a Bright Candy Cot and Candy Dot Brad Base to place it onto the card. 


The following were used: