Friday, June 27, 2014

Sweet Stuff


I was so happy to see some cute children oriented stamp sets in the new catalog.  Sweet Stuff is perfect for that little girl in your life.  I know my granddaughter will love her card.
 
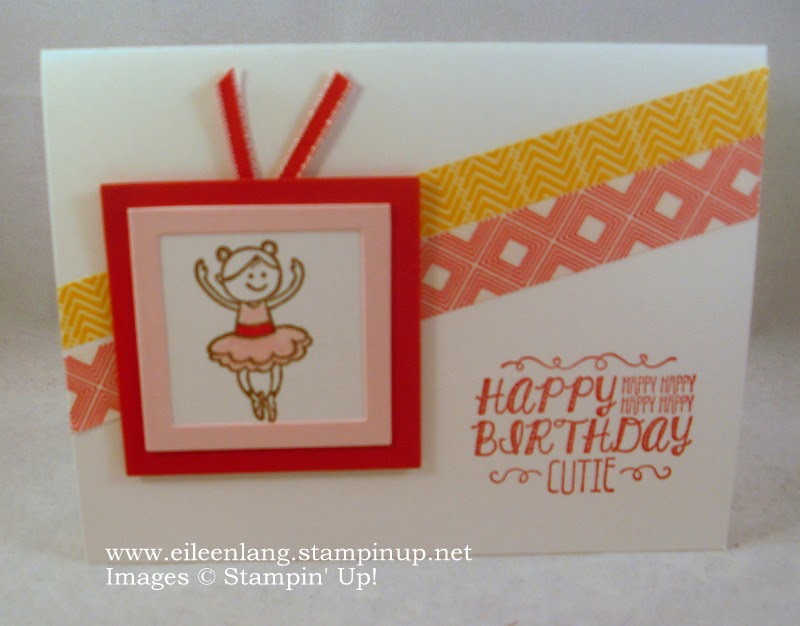
My card base is Whisper White Card Stock that was decorated with Beach House Washi tape.  I love Washi Tape and was so happy to see some new designs added as well as some older ones carried over.  It is so easy to use, and really economical too.
 
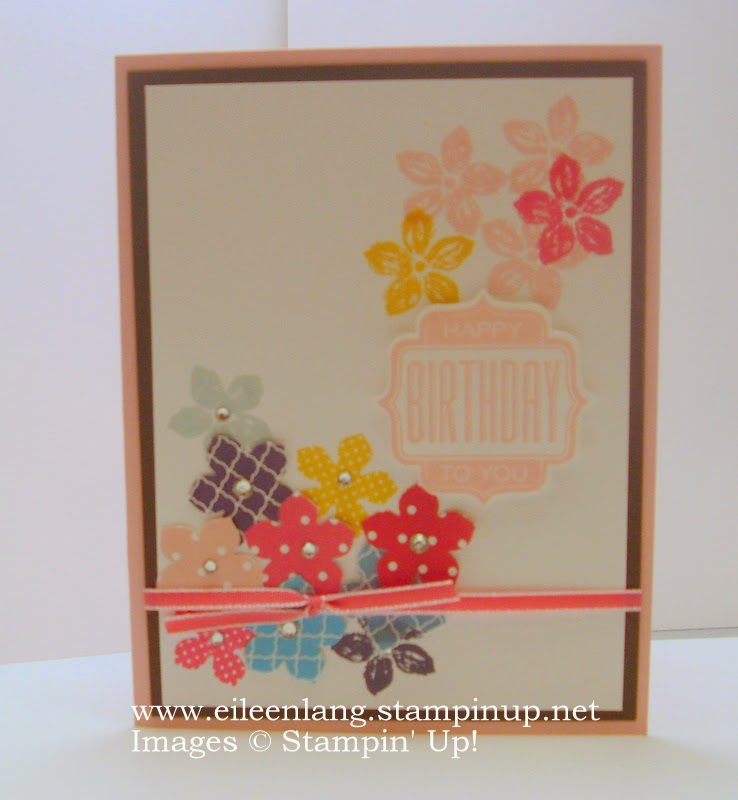
I created my frame by cutting Real Red, Pink Pirouette and Whisper White Card Stock using Square Framelits.  To create the opening in the Pink Pirouette Frame you need to cut two different sized framelits on the same piece of Card Stock.  The opening is what you get from the smaller size framelit and the frame is what is left of the larger size. 
 
My image was inked in Soft Suede and colored in using my markers, and some Real Red 1/8" Taffeta Ribbon was added to finish the frame. The Happy Birthday was stamped with Real Red Ink, and the sentiment says it all.
 
The following were used:
Card Stock:  Whisper White #100730, Real Red #102482, Pink Pirouette #111352
Ink: Real Red #126949, Soft Suede #126978  Markers:  Real Red #100052, Subtles #131263
Stamp Set:  Sweet Stuff #134153 w or #134156 c
Washi Tape:  Beach House #133689
Tools:  Big Shot #113439, Squares Framelits #130921
Ribbon:  Real Red 1/8" Taffeta #119251

Thursday, June 26, 2014

Blue Ribbon Graduation


The Blue Ribbon Stamp Set is just the ticket for that special graduation card.
 
I paired my stamped images up with some Old Olive and Tempting Turquoise Card Stock and a piece of Sweet Taffy Designer Series Paper.  I got the color scheme by coordinating my card stock with the colors in the designer paper.  One of the reasons I love Stampin' Up! products - all of the coordinating accessories. 
 
I inked my scalloped ribbon using Old Olive Ink, and inked the Congrats in Tempting Turquoise. I cut the bottom of this out with my Paper Snips, and was able to punch the top piece using my 2 3/8" Scallop Circle Punch.  The trick to doing this is to cut around the two bottom scallops on both sides, and the ribbon pieces at the bottom.  You can then slip this into your punch pulling the banner pieces up and through so they don't get punched.  This saves you a bit of time, but if you don't have the punch it doesn't take that long to cut out.
 
I also added some Old Olive 1/8" Taffeta Ribbon under my image for a bit more embellishment.
 
The following were used:
Card Stock: Old Olive #100702, Tempting Turquoise #102067
Designer Series Paper: Sweet Taffy #133693
Ink: Old Olive #126953, Tempting Turquoise #126952
Stamp Set:  Blue Ribbon #131964 w or #125981 c
Punch:  2 3/8" Scallop Circle #118874
Ribbon:  Old Olive 1/8" Taffeta #119256

Wednesday, June 25, 2014

Honeycomb Hello

When the new catalog came out and I saw that the Hexagon Hive Thinlits Die was carried over and a new stamp set called Honeycomb Hello coordinates with it and that the two can  be purchased as a bundle I finally got to check it off my wish list.  It adds a unique layer to your card.

My card base is Sahara Sand Card Stock, and my Hexagon Hive was cut out using Whisper White Card Stock.  I placed this onto my layer using my Glue Pen on the thin edges and then some Snail on the larger pieces that don't get cut out.

I stamped some images from the Honeycomb Hello Stamp Set in random order and highlighted the two birthday sentiments using my 2014-16 Lost Lagoon In Color Marker. 

The following were used:
Card Stock:  Sahara Sand #121043, Whisper White #100730
Ink: Lost Lagoon #133644   Marker:  2014-16 In Color #133654
Stamp Set:  *Honeycomb Hello #134075 w or #134078 c
Tools:  Big Shot #113439,*Hexagon Hive Thinlits #132965
*The Stamp Set and Thinlit can be purchased in a bundle to save you 15%.  The numbers you would use are #136603 w or #136604 c
Adhesive: Glue Stick #130654, Snail #104332

Monday, June 23, 2014

June Paper Pumpkin

The June Paper Pumpkin kits have arrived and if you are a subscriber I'm sure you will have fun putting it together.  If you are not a subscriber but want to see what some of the kits look like here is a video by Stampin' Up! showing how easy it is to create with the June kit.

If you are a one of my customers and a subscriber or are thinking of subscribing, I will be having a Paper Pumpkin Class at my house on Wednesday, July 2nd at 10 AM.  If you have received kits in the past feel free to bring any unfinished kits to the class or bring any left over supplies.  We can work together to create and get other ideas using the products that came in your kits. 

If you haven't signed up please feel free to stop by and look at some of my past kits and the great products that came in them, along with the projects made.  I can answer any questions you may have about signing up, and also answer any questions about the prepaid subscriptions.

Any of my subscribers will also receive their choice of a  FREE clear or wood mount case as a thank you from me.  These cases are a great way to store your ink spots and stamps that come in every kit and are yours to use over and over again.

My direct link for you to sign up for My Paper Pumpkin is here.  


Thursday, June 19, 2014

Lovely Lace


If you look closely you can see the Lovely Lace Embossing Folder was used as the background for my card base.  Such a pretty embossing folder that I didn't want to cover up, so I added only a few more touches.
 
My card base is Whisper White Card Stock that I layered with Basic Black and then another Whisper White layer embossed with the Lovely Lace Folder.  I added a few punched Scallop Circles embellished with a pearl, and my sentiment that was cut out using my Big Shot and a Starburst Framelit. 
 
The following were used:
Card Stock:  Whisper White #100730, Basic Black #121045
Ink:  Basic Black #126980
Stamp Set:  Starburst Sayings #133182 w or #133185 C
Punch: 7/8" Scallop Circle #127811
Embellishment:  Pearl Basic Jewels #119247
Tools:  Big Shot #113439, Lovely Lace Embossing Folder #133737, Starburst Framelits #132967

Tuesday, June 17, 2014

My Paper Pumpkin Direct Link


If you are a customer of mine and have any questions about Paper Pumpkin or want to sign up for this monthly kit here is my direct link.  Just click here and you will be taken directly to my Paper Pumpkin Page. 

I love the variety of the monthly kits.  Some months you receive supplies to make cards, other months there might be some great party kits or home decorating kits.  All of the supplies are included.  If you subscribe through me I will let you select your choice of a Clear or Wood Case to help you store your left over supplies, such as the stamps and ink spots you receive in each kit.

I will also be happy to give you some new ideas on other ways you can use your supplies.  A fun surprise each month that comes directly to your door.  Couldn't be any easier than that.

You can sign up for prepaid subscriptions or a month to month subscription.  Please let me know if you have any questions.

Wednesday, June 11, 2014

Petite Petals Birthday


 A lot of Petite Petals to create a layer of flowers for a special birthday.
 
I stamped some Petite Petals and also punched some out using a variety of Designer Series Paper.  I arranged them on my card and then added my Happy Birthday from the Tag Talk Stamp Set.  I added some Melon Mambo 1/8" Taffeta Ribbon, as well as some Rhinestones for a bit more embellishment.
 
I love when my stamp sets have coordinating punches, and both the Petite Petals and Tag Talk Stamp Sets do.
 
The following were used:
Card Stock: Blushing Bride #131198, Whisper White #100730, Early Espresso #119686
Designer Series Paper:  Brights Paper Stack #130134, Regals Paper Stack #130139
Ink:  Blushing Bride #131172, Crushed Curry #131173, Perfect Plum #129693, Soft Sky #131181, Melon Mambo #126948
Ribbon: Melon Mambo 1/8" Taffeta #131207
Stamp Sets:  Petite Petals #133152 w or #133155 c, Tag Talk #134149 w or #134252
Punches:  Petite Petals #133322, Label Bracket #132153
Embellishment: Rhinestones #119246

Monday, June 9, 2014

Work of Art Thank You


I just had to create another card using the Work of Art Stamp Set for my stamp class this month.  The ladies liked this set when they made a card made at my Open House showcasing all of the new In-Colors so I thought I would design another card with it, this time making a Thank You Card.
 
My card base is Crisp Cantaloupe Card Stock with a layer of Whisper White that I used to stamp my watercolor images using Crisp Cantaloupe, Baked Brown Sugar and Hello Honey Ink. I then added some Banner Framelits cut with Baked Brown Sugar Card Stock and  Lullaby Designer Series Paper. The Baked Brown Sugar Framelit was also embossed with the Decorative Dots Embossing Folder.
 
My final layer was stamped with more watercolor marks onto a piece of Whisper White Card Stock that I cut out with an Apothecary Accents Framelit.  I added my Thank You, and a tiny flower from the new Itty Bitty Accents Punch Pack.  A small pearl was added to the center of the flower and this layer was placed on with dimensionals. To finish the card I tied some Crisp Cantaloupe and Baked Brown Sugar Thick Baker's Twine to the top of my layer. 
 
The following were used:
Card Stock: Crisp Cantaloupe #131298, Whisper White #100730
Designer Series Paper: Lullaby #133695
Ink: Crisp Cantaloupe #131176, Baked Brown Sugar #131174, Hello Honey #133643
Stamp Sets:  Work of Art #134111 w or #134114 c, Another Thank You #136835 P
Tools:  Big Shot #113439, Banners Framelits #132173, Apothecary Accents Framelits #127003, Decorative Dots Embossing Folder #133520
Punch: Itty Bitty Accents Punch Pack #133787
Embellishment:  Pearl Basic Jewels #119247
Ribbon:  Crisp Cantaloupe Thick Baker's Twine #135636, Baked Brown Sugar Thick Baker's Twine #135639

Friday, June 6, 2014

New - Fast Fuse Adhesivew - How to use vide0

I purchased the new Fast Fuse Adhesive #129026 with my catalog pre-order.  I love how strong it is, but did have to learn how to use it.  So, I thought I would share with you a video made by Stampin' Up! to show you the correct way to use this new adhesive.

Also good to know - when you purchase the refill which is #129027 you get an extra 8 yards.  This adhesive bonds instantly and neatly and is safe for preserving your projects.  

Thursday, June 5, 2014

Bravo


Just in time for Graduation Cards, the Bravo Stamp Set has great sentiments to make any graduate happy and proud.  What I like even more about it is that it is a Photopolymer Stamp Set so it is really easy to get perfect placement every time.
 
My card base of Whisper White Card Stock was layered with a piece of Designer Series Paper from the Moonlight Paper Stack.  I cut the ends to make it look like a banner, and then added some new Hello Honey and Lost Lagoon 3/8" Stitched Satin Ribbon.  For additional dimension I also cut a piece of Hello Honey Card Stock and punched out the tiny star which is from the new Itty Bitty Accents Punch Pack.  I placed this on with a dimensional.
 
I stamped my sentiment with Basic Gray Ink, and then also added some additional sentiments from the Bravo Stamp Set for the inside of the card. 
 
The following were used:
Card Stock:  Whisper White #100730, Hello Honey #133678
Designer Series Paper: Moonlight Paper Stack #133701
Ink: Basic Gray 3126981
Ribbon:  Hello Honey 3/8" Stitched #133671, Lost Lagoon 3/8" Stitched #133672
Stamp Set:  Bravo #135380
Punch:  Itty Bitty Accents Punch Pack #122787
Adhesive:  Dimensionals #104430l, Snail #104332