Showing posts with label Treat Bags. Show all posts

Thursday, January 10, 2019

Easy Valentine Treats


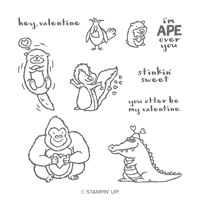
I used the new Hey Love stamp set to make some easy Valentine Treats.  I think the animal images and cute sayings are perfect for these M & M treats.  

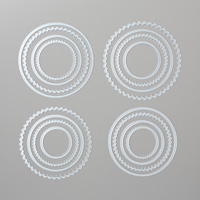
I cut some circles to go behind my images to add a bit more embellishment, but in no time these treats are finished, and ready to be handed out for Valentine's Day. 


The following were used:

Thursday, March 6, 2014

"Chick Peeps" for Easter

I love all the colorful "Chick" Peeps candies they have out for Easter, and they fit nicely into the 4" x 6" Cellophane Bags.  They will be part of my Easter items for sale at my Spring Craft Fairs.  

I cut my 4" x 6" bag about an inch from the top so it measures 4" x 5", so there is less room between the top of the bag and the items in the bag.  The top was made by cutting a Top Note Bigz Die and and adding punched pieces for the face, and I used my Fringe Scissors to cut the hair at the top.

I added my treats and the Happy Easter sentiment that punched out with the Word Window Punch.

I also made "Bunny Peep" bags and I did show them to you last year, but thought I would show a picture again of the ones I did this year.

I love matching the peep with our Card Stock and ink.  These were also made with the Top Note Bigz Die and a variety of punches for the face.   

The following were used:
Card Stock:  Wisteria Wonder #122922, Daffodil Delight #119683, Pink Pirouette #111351, Pumpkin Pie #105117, Whisper White #100730
Ink:  Wisteria Wonder #126985, Daffodil Delight #126944, Pink Pirouette #126956, Pumpkin Pie #126945
Accessories:  4" x 6" Cellophane Bags #102757
Tools:  Big Shot #113439, Top Note Bigz Die #113463, Fringe Scissors #133325
Punches:  1 1/4" Circle #119861, 1" Circle #119868, 3/4" Circle #119863, Extra Large Oval #119859, Large Oval #119855, Word Window #119857
Stamp Set:  Teeny Tiny Wishes #128748 w or #127802 c

Friday, September 20, 2013

Floral Frames Framelits Thanksgiving Treat


I was looking for new ways to make treat boxes or bags for the holidays.  So, I took the largest Floral Frames Framelit to make this quick Thanksgiving treat.

To make the treat holder, I took a piece of So Saffron Card Stock cut to measure 8 1/2" x 5 1/2" and folded it in half.  I took my Framelit and put it on my paper with the bottom portion of the Framelit placed over the fold line to create the holder.  To decorate the front I cut another Floral Frames Framelit with a piece of Sweater Weather Designer Series Paper.  I added my sentiment using Crumb Cake Ink and cut this out with a Apothecary Accent Framelit. 

Inside the holder I placed Candy Corn into a 4" x 6" Cellophane Bag and adhered it using Sticky Strip.  I added the handle, which is a piece of 7/16" Natural Trim.

The following were used:
Card Stock:  So Saffron #105118, Very Vanilla #101650
Designer Series Paper: Sweater Weather #132184
Ink: Crumb Cake #126975
Stamp Set: Harvest of Thanks #131736 w or #131739 c
Tools:  Big Shot #113439, Floral Frames Framelits #127012, Apothecary Accents Framelits #127003
Accessories:  4" x 6" Cellophane Bag #102757
Ribbon:  7/16" Natural Trim #129287


Sunday, March 10, 2013

Craft Fair Set Up


Center display rack showcasing the Easter products.  Also in this picture Sticky Note Easels and a lot of cards with matching purses marketed for Mother's Day and Teacher Gifts.


A closer look at my Bunny Peeps, Bunny Poop, Carrots, and Mini Milk Cartons.
On the left hand side you can see my display of birthday lollipops made with leftover brad containers. 


Large Hershey Chocolate Bunny Bars, Sticky Note Easels, Cards with Matching Purse


Gift bags and Mothers Day gifts. 


Card displays, head bands and bows


Easter Pencils and M & M Treats


Hershey Nougat Trays and Easter Chicks
 
I participated in my local community colleges annual Spring Craft Fair this weekend.  I was able to set up on Friday, the day before the event, and I always take advantage of the early set up.  So, as you can see in the pictures, there are still a lot of empty tables behind me, but on the day of the event the place was full of vendors, and thankfully customers too. 
 
I always take pictures before I leave just so I have proof that I did set up, just in case any large items would be missing.  But, I have never had any problem with leaving my items there over night, and it makes for an easier day when the fair actually takes place.  I can just go in the morning of the event, do any last minute changes to my display, and relax before the crowd arrives.  It was a great day, sold a lot of products, picked up some new customers, and was even asked to make items for a local historical museum on a consignment basis. 
 
A lot of the items pictured are already on my blog and can be found under the Easter or Craft Fair label. 
 
Craft fairs are a lot of work, but I find that they have helped me expand my business through networking with others at the event, by meeting new customers, and by talking to others about Stampin' Up! and getting my name out in the community that this is what I do, and this is what any one can do with the wonderful products made by Stampin' Up!.  
 

Thursday, March 7, 2013

Bunny Poop!


Well, I made Reindeer and Snowman Poop for Christmas, and it was a big hit.  So, I thought why not make Bunny Poop for Easter.  They were  big sellers at my craft fairs, and my grandchildren loved  them too. 
 
I used the Big Shot to cut the Top Note Bigz Die and folded it in half, stapled it to a 4 x 6 cellophane bag, and them added the saying which I typed on my computer.  I made boy and girl bunnies, and used markers to color in the images.  I added some retired grosgrain ribbon to make them easier to carry. 
 
The saying is:  I've heard that you've been naughty so here's the inside scoop...All you get for Easter is Bunny Poop? 
 
The following were used:
Card Stock:  Pretty in Pink #199458, Bashful Blue #105120, Whisper White #100730
Stamp Set:  A Little Bit of Spring #126009 w or #126011 c
Punch:  Extra Large Oval #119859
Ink:  Early Espresso #126974    Markers:  Subtles Collection #119700
Tools:  Big Shot #113439, Top Note Bigz Die #113463
Packaging:  4" x 6" Cellophane Bags #102757
 

Tuesday, February 26, 2013

Sent with Love

 
Product idea created by Stampin' Up!

• Sent with Love*

Paper
• Whisper White Cardstock
• Sent with Love Designer Series Paper*

Ink
• Island Indigo Classic Stampin’ Pad®

Stampin’ Up! Accessories
• Calypso Coral Baker’s Twine
• 4" x 6" Cellophane Bags
• Stampin’ Dimensionals®
• Hole punch

*Special promotional product—only available Feb 1 – April 30, 2013!

**Get the Send with Love Stamp Set, Sent with Love Designer Series Paper, and Calypso Coral Baker’s Twine in a special bundle at 20 percent off — Feb 1 – April 30, 2013!
 
My post today was taken directly from the Ideas section of my online store.  It was not created by me, but by Stampin' Up!.  I wanted to showcase it today, because this promotion runs for a limited time and ends April 30th.
 
You can purchase the Sent with Love Stamp Set, and Sent with Love Designer Series Paper separately, or put them together in a bundle with Calypso Coral Baker's Twine for a savings of 20%.
 
To see this, and more product ideas, you know you can check my creations here on my blog, but don't forget about some other wonderful product ideas from Stampin' Up which are listed on my online store - www.eileenlang.stampinup.net/ , or just click the link in the left hand column of my blog.   
 

Friday, January 11, 2013

Petite Pocket Valentine Treats

 
If you have a Big Shot Die Cutting Machine you can make these Petite Pocket Valentine Treats and fill them with some candy and you have a special gift for your little Valentine's.  My grandchildren love Air Heads candy and they are the perfect size to fit in the pocket.  I added an extra lollipop too.
 
To make my treats, I cut Pink Pirouette and Real Red Card Stock using my Big Shot and the Petite Pocket Bigz XL Die.  You can cut two pockets with one sheet of 8 1/2 x 11 card stock, and they go together with just two small strips of Sticky Strip along the sides.  I then cut strips of Love Impressions Designer Specialty Paper that I purchased on the Clearance Rack (and I just looked and it is still available) and wrapped it around the center.  I then added a large Scalloped Heart of Hearts Embosslits and a small punched heart, and my sentiment. 
 
If you don't have a Big Shot, Sale-a-bration is here in a few weeks. With the purchase of a Big Shot you already qualify for one free item in the Sale-a-bration catalog, and if you purchase an additional .05 of merchandise - well I know there is nothing for .05 but that is how close you are to getting two free products, you would be able to purchase a second product for free too. During Sale-a-bration you get to select one free product in the Sale-a-bration catalog for every $50 you spend in Stampin' Up! merchandise from the Annual Catalog or the Spring Catalog. A great way to get some really nice items for FREE!.

The following were used:
Cardstock:  Pink Pirouette111351, Real Red #102482, Whisper White #100730
Ink:  Real Red #126949
Designer Series Paper:  Love Impressions Specialty (retired - check the clearance rack for availability)
Stamp Set:  Delightful Dozen #122650 w or #122652 c
Tools:  Big Shot #113439, Petite Pocket Bigz XL Die #123131, Scalloped Heart of Hearts Embosslits #117332, Extended Cutting Pads #113478, Extended Premium Crease Pad #117630
Punches:  Scallop Oval #119856, Small Heart #117193
Adhesive:  Sticky Strip #104294, Dimensionals #104430

Monday, August 20, 2012

Ghoulish Googlie Treats


This was the quickest I ever made treat bags.  Using the Ghoulish Googlies Designer Kit and the coordinating Googly Ghouls Stamp Set I was able to create 20 Halloween Treat Bags in no time at all. The kit comes with 20 printed double-sided tags, 10 glassine bags, 50 adhesive-backed googly eyes, and 10 pieces of Pumpkin Pie/Whisper White Baker's Twine.  I ordered 2 sets and used all of the bags, but still have some eyes and tags left to use on other projects.

I embossed my bags with my Big Shot and the Spider Web Embossing Folder to add a more "ghoulish" look.  The only other additions I made were the "happy halloween" sentiment on some of the bags, but everything else came with the kit and Googly Ghouls Stamp Set.  Now, after I finished my project I noticed that I really stamped my images on upside down, but I didn't even realize that until I opened my holiday mini catalog and looked at the project they shared.  I still like the way they look and don't think anyone else will notice.  I filled each bag with two candy bars and am saving them for one of my Fall craft fairs.

The following were used:
Kits: Ghoulish Googlies Designer Kit #126914 - Holiday Mini
Stamp Sets:  Googly Ghouls #128060 wood or #128063 clear, Teeny Tiny Wishes #11537 wood or #127802 clear
Tools:  Big Shot #113439, Spider Web Embossing Folder #120889
Punch:  Word Window #119857


Friday, September 16, 2011

Diaper Fold Halloween Treat Pouch

Have a small treat to hand out?  Why not make a quick Diaper Fold Treat Pouch to make it a little bit special.

To make the pouch you just need to take a piece of 6 x 6 cardstock or Designer Series Paper and fold it first in half on a diagonal, then fold the right side over like you would a diaper, and then fold the left side over.  You now have the front flap which you can just fold down to keep it in place. 

If you want to get more detailed information with pictures, go to my blog post on 9/13/10 to see pictures of each step.  Or go under labels and search Treat Bags. 

To make today's treat I used the following:
Cardstock:  Basic Black #121045, Whisper White #100730
Designer Series Paper:  Retired from Clearance Rack
Stamp Set:  Wicked Cool #118738 wood or #120600 clear
Ink:  Old Olive #102277
Punches:  1 1/4" Circle #119861, 1 3/8" Circle #119860
Accessories:  Crop-a-Dile #108362
Ribbon:  Basic Black 1/4" Grosgrain #109027

Friday, August 12, 2011

Altered Fancy Favor Box

I saw a similar box created by SU Demonstrator Chris Galbraith in my August Stampin' Success Magazine.  I added a few different techniques and accessories to come up with a different way to create this altered Fancy Favor Gift Box.

I first cut a piece of Always Artichoke Cardstock using my Big Shot and the Fancy Favor Box Bigz xl Die.  When you cut out your box you will have a leftover piece of paper that works great for the handle.  I attached this to the box using brads.  To make the box look larger, I then took my Scallop Square Bigz Clear Die and cut two squares to attach to both sides of the box.  I embellished the front with a piece of Always Artichoke, Baja Breeze and Whisper White Cardstock.  Next I used the Perfect Pennants Bigz L Die and cut out the large scallop circle using Baja Breeze Cardstock.  I added my stamped and punched sentiment, as well as some retired felt flowers to dress it up. 

If you don't have the Scallop Square Die, you can use your Scallop Edge Border punch to make your own scallop squares.  That is what Chris did for her box.  But, I took the easy way out and just cut two scallop squares instead!

Now, all you need to do is add your gift! 

For today's gift box I used the following:
Cardstock:  Always Artichoke 12 x 12 #124614, Always Artichoke #105119, Baja Breeze #111352, Whisper White #100730
Ink:  Always Artichoke #105219, Baja Breeze #111833
Stamp Set:  Perfect Punches #117022 wood or #120517 clear, Bring on the Cake #121899 wood or #121958 clear
Punches:  3/16" Corner #119871, 1 3/4" Scallop Circle #119854, 13/8" Circle #119860
Embellishment:  Neutral Brads #119736
Accessories:  Big Shot #113439, Fancy Favor Bigz XL Die #115965, Extended Cutting Pad #113478, Scallop Square Bigz Clear Die #115950, Perfect Penants Bigz L Die #123126, Dimensionals #104430

Thursday, August 11, 2011

Just for Fun Treat Bags

Need a quick treat bag for a birthday party or other fun occasion, just add your favorite candy to your bag, and stamp an appropriate sentiment or image and your done.

For today's treats I filled the bags with M & M's and added two pinwheels to a punched scallop circle. I stamped one pinwheel directly onto the circle, and cut the other one out.  By adding a brad to the center of the pinwheels they actually spin. 

I used the following Stampin' Up! products:
Stamp Set:  Sweets for the Sweet #122510 wood or #122512 clear
Punch:  1 3/4" Scallop Circle #119853
Accessories:  Sticky Strip #104294
I also used a variety of inks and brads!


Monday, March 21, 2011

Top Note Die Easter Treats

I am getting ready for another Craft Fair this Saturday, and making treat bags is a must.  Last year I sold out of the little peep bags so I thought I would do them again this year, as well as the bunny bags, both made with the Top Note Bigz Die and small cellophane bags. 

Both bags started with a cut Top Note Die piece.  For the peep bag, the eyes were created by punching  with the 1" and 1 1/4" Circle punch, and cutting the circles in half.  The nose is a corner of the Extra Large Star Punch.  I made small slits for the eyes with the uni-ball Signo Gel Pen.  Holes were punched through both the Top Note piece and the cellophane bag with the Crop-a-Dile and tied together with 1/4" Grosgrain Ribbon.  I added a Happy Easter sentiment from the Teeny Tiny Wishes Stamp Set.  I purchased peeps in 5 different colors, and I made the Top Note Piece to coordinate with the color of the peep.  When they are all put together in a large basket they are really colorful, and brighten up the table. 

The bunny bag was also embossed with the Perfect Polka Dot folder for added dimension, and the bunny was stamped with Chocolate Chip ink and then punched with the 1 1/4" Square Punch and then layered over a punched Scallop Square.  This bag was tied together using Daffodil Delight 3/8" Taffeta Ribbon.  The Happy Easter sentiment on this bag is from a retired stamp set, but I loved it so much that I couldn't part with it.  It was punched out with the Scallop Oval punch. 

To make today's treats I used the following:
Cardstock:  Whisper White #100730, Pretty in Pink #100459, Basic Black #12104, Pumpkin Pie #105117
Stamp Sets:  Teeny Tiny Wishes #115370, Forest Friends #113748
Ink:  Chocolate Chip #100908, Pretty in Pink #101301
Punches:  1" Circle #119868, 1 1/4" Circle #119861, Extra Large Star #119875, Word Window #119857, 1 1/4" Square #119865, Scallop Square #119884, Scallop Oval #119856
Ribbon:  Pretty in Pink 1/4" Grosgrain #109032, Daffodil Delight 3/8" Taffeta #119766
Accessories:  Big Shot #113439, Top Note Bigz Die #113463, Perfect Polka Dot Embossing Folder #117335, Crop-a-Dile #108362, Small Cellophane Bags #103104, uni-ball Signo Gel Pen #105021

Sunday, November 14, 2010

Quick Christmas Treats

If you are looking for some cute Christmas treat ideas, either of today's projects would fill that need.

The skittles filled skinny treat bag was embellished with some stamped punches, and tied with silver cord.  The candy cane was embellished the same way.  Either of these treats would be great if you needed a lot of small gifts in a hurry.  Such as children's classroom gifts, teacher gifts, or to add to a Christmas present as a special tag.  The candy cane would also make a cute tree decoration. 

To make today's post I used the following Stampin' Up! supplies:
Stamp Sets:  Tags til Christmas #120847 wood mount or #121169 clear mount, Delightful Decorations #116517
Ink:  Real Red #103133, Garden Green #102272
Cardstock:  Whisper White #100730
Designer Series Paper:  Candy Cane Christmas #120809 (Holiday Mini)
Punches:  Ornament #119847, Scallop Square #119884, 2 3/8" Scallop Circle #118874
Ribbon:  Real Red 1/8" Taffeta #119251

Wednesday, October 20, 2010

Top Note Halloween Treat Bag

Halloween is almost here, and the Top Note Bigz Die makes a cute bag topper for those special treats.

I took some Basic Black cardstock and ran it through my Big Shot using the Top Note Bigz Die.  I then embossed the cut die with the Square Lattice Embossing Folder for some added texture.  The pumpkin was made by punching three ovals with the 1 3/8" Oval Punch, and layering them together.  I sponged some Soft Suede ink onto each oval for added dimension, and the leaf was punched from the Two-Step Bird Punch.  I placed the candy in a small cellophane bag, punched two holes with my Crop-a-Dile and Pumpkin Pie Grosgrain Ribbon keeps it all together. 

To make today's Treat Bag I used the following:
Cardstock:  Basic Black #121045, Pumpkin Pie #105117, Old Olive #100702, Whisper White #100730
Stamp Set:  Teeny Tiny Wishes #115370
Ink:  Pumpkin Pie #105216, Soft Suede #115657
Ribbon:  Pumpkin Pie 1/4" Grosgrain #109030
Punches:  Word Window #11957, 1 3/8" Oval #119863
Accessories: Crop-a-Dile #108362, Small Cellophane Bag #103104

Monday, September 13, 2010

Diaper Fold Halloween Treats

Really simple treat container using the Diaper Fold!


To start cut a piece your paper to 6" x 6".  Next, fold in half on a diagonal, then fold the bottom right end over to meet the left side, then do the same on the left..  All that is left to do is pull the top flap over and you have a really cute gift container that stays together without any adhesive.  Decorate with your favorite saying or ribbon, fill with a treat and your all done.  

As you can see - two different looks with Designer Series Paper depending on which of paper you use.

To make my Halloween Diaper Fold Treat Container I used the following:
Designer Series Paper:  Wicked Fun #117400
Stamp Set:  Grateful Greetings #116511
Ink:  Tangerine Tango #111349
Punch:  Scallop Square #119885
Ribbon:  Raven 1/2" Lace Trim #120985 (Holiday Mini)


Friday, September 10, 2010

Halloween Monster Treats

Monster Treat bags made using the Big Shot and Top Note Die can take on many variations.  Just mix in a few different punches for the face features, sponge a little color onto your cardstock and have fun creating your own style monster.

Both the front and back of the bag were cut with the Top Note Die, but only the front is decorated.  On the back piece I just sponged on some ink for added color.  The hair is a strip of black cardstock also cut with the top of the Top Note Die and then cut into different lengths for bangs.  Circle, square, oval, and word window punches were used for all of the features.  A gel pen added some dimension to the eyes and one monster mouth, and a black marker was used to draw on the green monster mouth.  The bags used for the candy were purchased at a local craft store.  The handle is just a strip of black cardstock and some brads to keep it in place. 

To make today's project I used the following:
Cardstock:  Basic Black #121045, Whisper White #100730, Brocade Blue and Gable Green (Retired)Punches:  Word Window #119857, 1 1/4" Square #119865, 1 3/8" Oval #119863, 1" Circle #119868, 3/4" Circle #119873, 1/2" Circle #119869
Accessories:  Sponges #101610, Uni-ball Signo Gel Pen #105021, Basic Black Marker #100082. Neutral Brads #119736
Ink:  Pumpkin Pie #105216, Old Olive #102277, Perfect Plum #101437

Monday, August 23, 2010

Quick Mini Gifts!

I love making cute treats to add to gifts or to give out for special occasions.  With the use of my Big Shot Machine, some punches, ink, stamps and candy of course, I was able to make some really quick, but cute candy treats.  I saw several other talented SU demonstrators make these bags, and everyone has such great ideas and I just wanted to share my version with you.

Just think of all of the possibilities.  For Christmas add a Christmas stamp, some red and green candy.  For a baby shower, pink or blue mints, a cute baby stamp.   I used Sticky Strip to adhere the Die Cut flowers and Pumpkin to the bag (bags from clearbags.com).   Stampin' Up also offers clear Cellophane Bags in 3 sizes that are also great for treats, favors, and gifts.  Sizes are 3" x 5", 4" x 6", or 6" x 8".  So when you are looking to fill a larger gift bag, these work great too!

To make the gift bags I used the following:
Cardstock:  Basic Black #121045, Very Vanilla #101650, Chocolate Chip #102128, Pumpkin Pie #105117, Real Red #102482, Pear Pizzazz #119795, Brocade Blue (retired)
Ink:  Pumpkin Pie #105216, Real Red #103133, Brocade Blue (retired)
Markers:  Chocolate Chip #100071, Pear Pizzazz #119801 (In Colors Marker Pack)
Punches:  Scallop Circle #119854, 1 3/8" Circle #119873, Scallop Oval #119856
Stamp Sets:  Sincere Salutations #115068, Grateful Greetings #116511, Sock Monkey Accessories #111552
Ribbon:  Hemp Twine #100982
Accessories:  Big Shot Die Cut Machine #113439, Flower Daisies #2 Bigz Die #114520, Flower Folds Bigz xl Die #115970, Extended Cutting Pads #113478 (needed when cutting a Bigz xl Die), Sticky Strip #104294