Thursday, August 31, 2017

Don't forget to redeem Bonus Day Coupons!


The promotion is over so this is just a reminder for anyone who earned a Bonus Day Coupon last month.  Today is the last day to redeem your coupons.  Don't miss out.

Wednesday, August 30, 2017

Another Daisy Birthday Card

My daisy card was so popular at my August Stamp Class that I ran out of the Designer Series Paper I used to create the card.  No problem though, I just took another pretty piece of designer series paper, changed the color for my card base and layers, and added a piece of retired coordinating ribbon.  I also added some Pear Pizzazz ink to the end of my daisy petals and a White Perfect Accent to the center for a bit more embellishment.


When I find a design that my customers like, or that I like for that matter, it is easy to change it up just a bit by changing your color scheme.  This layout would work for not only a birthday card, but some of the ladies changed the sentiment in the center and made sympathy, get well, and thank you cards as well.

The following were used:

Tuesday, August 29, 2017

First Color Theory Card


Yesterday I posted a card made using this design that I made for my September Stamp Class.  You can see that I used the same card base, layers, and sentiment, but placed the sentiment on straight, added some coordinating ribbon and added the cut leaves.   A different look for both a feminine and masculine card.

It's easy to change your look but a time saver when you use the same cut layers.  I like to change things up a bit after a class using the already cut materials so I have a variety of cards on to use for personal use.


The following were used:

Monday, August 28, 2017

Color Theory Masculine Birthday

If you need a nice background for a masculine card, try a piece of Color Theory Designer Series Paper.  For my birthday card I used a piece of the Dapper Denim paper, and added my large birthday sentiment stamped in coordinating ink.

This was a card layout I had for my August stamp class, and changed the card up a bit by placing my birthday on a slant and adding some Washi Tape from the Basic Pack 3.  Love how all of these products coordinate.


The following were used:

Thursday, August 24, 2017

Watercolor Christmas Project Kit day 2

Yesterday I posted two of the cards in the Watercolor Christmas Project Kit, today I am posting the other two cards.  You get a total of 20 cards, 5 each of 4 different designs when you are done putting your kit together.  What a great value, and what a great timesaver if you need to make a lot of Christmas cards.  Not only do they get put together quickly, but they are really pretty as well.

The only thing I changed on these cards is the placement of the Gold Mini Sequin Trim on the second card.  Instead of putting it under my layer I tied it into a bow and placed it on top of the sentiment.

And, how clever is it that with the left over Sequin Trim you take the small sequins off of the thread and use them for embellishment on the card below.


The following were used:

Wednesday, August 23, 2017

Watercolor Christmas Project Kit

I shared the video a few days ago showing the Watercolor Christmas Project Kit that will be available when the Holiday Catalog goes live on September 1st.  I couldn't wait to get my kit and start creating the 20 cards that come in the kit.  You get 5 each of 4 different designs.  Below I am showing you two of the cards you can create.


The card above was created just as the instructions stated.  I didn't feel the need to add anything but a sentiment inside.


To the card above the only thing I added were the little sequins.  

You can purchase a coordinating stamp set called Watercolor Christmas to use for the sentiments.  I did purchase the stamp set because I really liked the large sentiments and how easily they fit on the cards.  If you like the kit and have a lot of other holiday stamps that you know will fit the cards you can just purchase.  

Kit details:

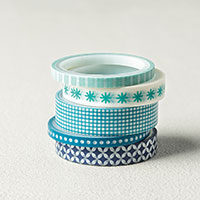
Makes 20 cards, 5 each of 4 different designs.  Folded card size is 4 1/4" x 5 1/2".  Envelopes come with a gold foil liner, and kit also includes cardstock and printed die-cut accents and backgrounds, and gold mini sequin trim.  

Tomorrow I will post a picture of the other two cards.  


The following were used:

Monday, August 21, 2017

August Paper Pumpkin

I love this month's Paper Pumpkin kit.  Not only do you get enough materials to make 8 full size cards but you also receive a really nice gift box to put them in, and in addition to that you get materials to make gift tags as well.

If you are not a subscriber you might want to check out the video below showing you the August kit and it might make you change your mind.


If you would like to try Paper Pumpkin now would be a great time.  From now until September 10th if you sign up you will receive the September kit at 50% off.  Once you get the kit, if you like what you see, you can continue to get one kit each month at the regular price of $19.95 plus tax.  If you are not satisfied you can cancel your subscription.  You can also opt for prepaid subscriptions as well.  To sign up click the Paper Pumpkin link in the upper left hand column of my blog and use the Code HALFOFF0917 to get the discount.


Monday, August 14, 2017

Rudolph "Spares"

I know it might seem early to be posting holiday items, but when you do fall craft fairs it takes awhile to get everything ready.  The item I worked on yesterday was Rudolph "Spares".  I was really happy to see the test tubes in the holiday catalog and I will make sure to keep a nice supply on hand for projects like this.


Really simple to make and should be a nice addition to the other items I will be creating.  


The sentiment was found online and the reindeer is from a retired stamp set.  Some current punches really made it easy to put together, and I filled the tubes with Cinnamon Imperial Candies.


The following were used:  Note - test tubes can be ordered September 1st unless you are a demonstrator.