Showing posts with label Embossing. Show all posts

Friday, June 15, 2018

Big Shot Embossing Mat by Stampin' Up!


One of the new products in the Annual Catalog is the Big Shot Embossing Mats.  Now  you can turn your favorite Framelits, Thinlits, and Edgelits dies into tools that will emboss your card stock instead of cutting it.  There is also a way to emboss and cut, and it helped me learn how to use the different mats by watching the video that Stampin' Up! made to show how it is done.


What a fun way to get more from all of your different dies.  You can order yours by going to my Online Store by clicking the shopping cart in the upper left hand column of my blog or sending me an e-mail or comment below.

I have tried mine, and plan on posting some pictures next week showing cards I made using it. 

Monday, June 13, 2016

A new look for your Embossing Folder


I made several cards using the two embossing folders in the Floral Affection set.  I made these cards the usual way of embossing the layer and then adding it to the rest of my card.  For this card, I embossed a piece of Whisper White Card Stock with one of the embossing folders, and instead of using it as a layer I cut it out instead.  The embossing lines are deep enough that it is easy to cut out. I sponged some Blushing Bride ink on the flower and placed it onto the rest of my layer with Dimensionals.

I also added some Playful Palette Designer Washi Tape to my layer for a bit more color, and stamped my birthday sentiment with the new Sweet Sugarplum Ink.  You will see in the list of items used below that I added the Watercolor Wishes Card Kit.  I didn't use the kit for the card since I made all of the cards awhile ago, but, the stamp set that comes with the kit can be used over and over again, and it has great sentiments in it as well.


Tuesday, June 4, 2013

Mosaic Madness


This is the other choice for a make and take at my Open House.  I saw several designs like this at the Regional Event I saw in Baltimore, Maryland when we got a sneak peek at some of the new items.  I knew then it would be a card I wanted to make at my Open House.  It showcases the Mosaic Madness Embossing Folder, Stamp Set, and Punch.  It is a really easy and quick card to make too.
 
My card base of Baked Brown Sugar was embossed with the Mosaic Madness Embossing Folder.  I then punched Soft Suede, Early Espresso and Island Indigo Card Stock with the Mosaic Punch.  I stamped some of the images from the Mosaic Madness Stamp Set on Whisper White Card Stock and then punched those out too.  I also ran one of the Island Indigo punched pieces back through my Big Shot to emboss that as well.  
 
You could also layer all of your punched pieces on your card stock and line them up with your embossing folder to give them all the raised image for a different look. 
 
The following were used:
Card Stock:  Baked Brown Sugar #131296, Soft Suede #115318, Early Espresso #119686, Island Indigo #122923, Whisper White #100730
Stamp Set:  Mosaic Madness #130246 w or 3130249 c, Itty Bitty Banners #132022 w or #126527 c
Ink:  Island Indigo #126986
Punch:  Mosaic #131267
Tools:  Big Shot #113439, Bitty Banners #129267, Modern Mosaic Embossing Folder #129984
 

Monday, June 3, 2013

Wildflower Meadow Embossed Card


This is one of the cards the ladies can make at my Open House next Monday.  It showcases the new Wildflower Meadow Embossing Folder, and some new colors.  I wanted a simple, yet pretty card to have as one of my make and takes, because the day is filled with a lot of extra activities too.
 
My card base is Whisper White Card Stock, with a layer of Calypso Coral.  I took another layer of Whisper White and ran it through my Big Shot using the Wildflower Meadow Embossing Folder.  I then had a nice raised image that I could sponge some ink over to bring out the image.  I also used an Itty Bitty Shapes Punch to add a Crisp Cantaloupe  center to the large flowers. 
 
The following were used:
Card Stock:  Whisper White #100730, Calypso Coral #122925, Crisp Cantaloupe #131298
Ink:  Crisp Cantaloupe #131176, Pistachio Pudding #131177
Stamp Set:  My Friend #128670 w or #122587 c
Tools:  Big Shot #113439, Wildflower Embossing Folder #129376, Stamping Sponge #101610
Punch:  Itty Bitty Shapes #118309


Thursday, April 5, 2012

Flower Fest and it sure smells yummy!

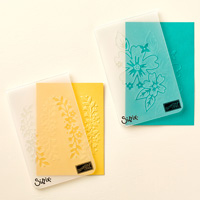
Want to give mom a nice surprise when she opens her card, add some Scented Stampin' Emboss Powder to your project and give her a nice welcome scent when she opens it up.
To make the card I started with Calypso Coral cardstock that was embossed with the Perfect Polka Dots Embossing Folder.  I added a small layer of Berry Blossoms Designer Series Paper, and a small piece of Calypso Coral 3/8" Ruffled Ribbon.

For the large flower, I first stamped the image using Versa Mark Ink onto a piece of Whisper White cardstock.  Next I added Clear Emboss Powder and heated the image.  I then sponged some Daffodil Delight ink over the center of the flower, and then added Calypso Coral ink to the rest of the image.  As you can see, the embossed areas resisted the ink.  To add the Vanilla Scented Emboss Powder, I reinked the flower again with my Versa Mark Ink, and then applied the Vanilla Emboss Powder and reheated the flower.  An In-Color Calypso Coral Designer Printed Brad was placed in the center for added embellishment.

Ah - what a nice aroma.  The scented powders come in Vanilla, Melon, and Cherry, and are available in the Occasions Mini Catalog until the end of April.  I don't know if they will be carried over into the new catalog, so if you would like to add a nice surprise to your cards or projects, don't forget to order them soon.

The following were used:
Cardstock:  Calypso Coral #122925, Whisper White #100730
Designer Series Paper:  Berry Blossoms #122350
Stamp Sets:  Flower Fest #122278 wood - #122289 clear, Delightful Dozen #122650 wood - #122652 clear
Punches:  Scallop Oval #119856, Extra-Large Oval #119859
Ink:  Early Espresso #119679, Calypso Coral #122939, Daffodil Delight #119667, Versa Mark #102283
Ribbon:  Calypso Coral 3/8" Ruffled #122976
Embellishment:  In-Color Designer Printed Brad #122940
Embossing:  Heat Tool #100005, Powder Pals #102197, Vanilla Scented Emboss Powder #125590,
Clear Emboss Powder #109130
Accessories:  Stamping Sponges #101610,  Big Shot #113439, Perfect Polka Dots Embossing Folder #117335

Tuesday, November 22, 2011

Oh Christmas Tree


Silver and gold embossing

The Pennant Parade Stamp Set is one of those sets that can be used for many occasions.  I like how the pennant can be turned into a Christmas tree.

Whisper White cardstock is my cardbase with a layer of Old Olive that was embossed with the Petals-a-Plenty embossing folder.  I stamped my pennants with Versa Mark ink and then heat embossed them with silver embossing powder, and the base was done the same way using gold embossing powder.  After punching out the pennants with the Petite Pennants Builder Punch, I placed the trees onto the card using dimensionals.  A glue dot behind each tree stand held them in place.  Some Real Red Satin Ribbon added a pop of color. I haven't figured out what sentiment I want to add to this card yet, but like the simplicity of it.

The following were used:
Cardstock:  Whisper White #100730, Old Olive #100702
Stamp Set:  Pennant Parade #122740 wood or #122742
Ink:  Versa Mark #102283
Punch:  Petite Pennants Builder #122361
Ribbon:  Real Red 5/8" Satin #117286
Accessories:  Big Shot #113430, Petals-a-Plenty Embossing Folder #116824, Heat Tool #100005, Silver Embossing Powder #109131, Gold Embossing Powder #109129, Dimensionals #104430, Glue Dots #103683

Thursday, October 13, 2011

Inked Embossing

If you want a different look for your embossing folders, take your Brayer and ink the flat surface of the folder.  Now your raised embossed image really stands out against the inked background.  There are so many uses for the Brayer, and that is the one accessory I need to use more often.

My card base is Very Vanilla cardstock with a layer of Soft Suede and then my inked embossed layer which is just another cut piece of Very Vanilla cardstock run through the Big Shot using Pool Party ink on my Petals-a-Plenty embossing folder.  Instead of using ribbon for my bow, I cut a piece of Spice Cake Designer Fabric.  I have quite a bit of Stampin' Up! fabric, and since I don't really sew I decided to use it in place of ribbon on some of my projects, and I really like the look.  My sentiment was punched out using the Decorative Label Punch and to get the second Soft Suede punch in the background I just cut another Decorative Label Punch with Soft Suede cardstock and cut the center out of it and then placed these pieces behind the full sized punch.

For today's card I used the following:
Cardstock:  Very Vanilla #101650, Soft Suede #115318
Stamp Set:  Curvy Verses #114948
Ink:  Pool Party #122938
Embellishment:  Spice Cake Designer Fabric #124066 (Holiday Mini)
Punch:  Decorative Label #120907
Accessories:  Big Shot #113439, Petals-a-Plenty Embossing Folder #116824, Dimensionals #104430

Monday, August 22, 2011

Embossed Hello, Doily

The silver embossing using the Hello, Doily stamp really brings out the delicate pattern and creates an elegant wedding card.  It look so much better in person, and up close it really shines.

I used Whisper White cardstock for the whole card.  The embossed layer was raised onto the base layer using dimensionals, and Basic Gray Satin Ribbon went well with the silver embossing.  I used two glue dots to adhere my sentiment instead of tying it onto the ribbon, and rounded the corners with the 3/16" Corner Punch

Supplies used:
Cardstock:  Whisper White #100730
Stamp Sets:  Hello, Doily #122845, Teeny Tiny Wishes #115370
Ink:  Versa Mark #102283, Basic Gray #109120
Ribbon:  Basic Gray Satin #124326
Punches:  3/6" Corner #119871, Word Window #119857
Accessories:  Heat Tool #100005, Silver Embossing Powder #109131, Dimensionals #104430, Glue Dots #103683


Wednesday, July 27, 2011

Flirtatious Congratulations!

Flirtatious Specialty Paper offers not only 10 sheets of pretty paper, but also 2 doily laser-cut double sided designs.  One sheet is in Pumpkin Pie, and the other in Melon Mambo.  I cut one of the doilies out from Melon Mambo sheet and turned it around to use the white side instead. 

Today's card is Pretty in Pink cardstock, with layers of Tangerine Tango and a sheet from the Flirtatious Specialty DSP.  To this I added my cut doily and three strands of Tangerine Tango 1/2" Scallop Dots Ribbon.  I wanted to add a brad to the center of my doily but needed something a little larger than the 3/16" brads which you can get in a variety of colors.  So instead I took one of my Jumbo 5/16" Whisper White Brads and changed it to a Tangerine Tango 5/16" Brad.  After stamping and punching my sentiment for the bottom of the card, I thought it looked a little bare, so using the opposite side of the DSP that was used for the layer, I punched two bitty flowers and placed them on the sides of the Congratulations.

How did I change my white brad to a Tangerine Tango Brad?  Well, it was really simple.  I took my brad and using tweezers to hold onto it, dipped the tip of it into my Versa Mark ink pad, and then into my Tangerine Tango Embossing Powder.  Next, using my heat tool, I set the color by heating it.  Instant change from white to tangerine! 

For today's card I used the following:
Cardstock:  Pretty in Pink #100459, Tangerine Tango #111349, Whisper White #100730
Designer Series Paper:  Flirtatious Specialty #122360
Stamp Set:  Wedding Sweet #115466
Ribbon:  Tangerine Tango 1/2" Scallop Dots #124144
Punches:  Modern Label #119849, Itty Bitty Shapes #118309
Embellishment:  5/16" Neutral Jumbo Brad #112534, Tangerine Tango Embossing Powder #123106
Accessories:  Heat Tool #100005

Monday, November 29, 2010

Emboss Resist Technique

If you want a different look for your card, try the emboss resist technique to showcase your stamped image.  The part that you embossed will not pick up the ink when you use your brayer to go over the image.  

I started with a card base of Whisper White cardstock, followed by a layer of Peach Parfait, and then another layer of Whisper White which I heat embossed with clear embossing powder and the Upsy Daisy Stamp Set.  I then took my brayer and rolled over the image with Night of Navy ink.  As you can see the image that was embossed resists the ink, therefore the term emboss resist.  I like this look when I am going for a nighttime silhouette or backround.  It is a much softer look that if I took Night of Navy cardstock and stamped Whisper White ink with my image. 

To make today's card I used the following:
Cardstock:  Whisper White #100730, Peach Parfait #119794
Ribbon:  Peach Parfait 1/2" Stitched Poly #119264
Ink:  Night of  Navy #102977
Stamp Set:  Upsy Daisy #111710, Because I Care #118384 wood mount, or #120118 clear mount (Hostess Level )
Punches:  Modern Label #119849, Small Corner #119871
Accessories:  Clear Embossing Powder #109130, Heat Tool #100005, Brayer #102395, Dimensionals #104430

Monday, November 22, 2010

Dyed Gold Bow

Yes, I like the card better with the bow dyed gold to match the gold embossing on the antlers and the Smooch Spritz on the card front.  Now it all goes together!

I started the card by embossing a piece of Baja Breeze cardstock with the Northern Flurry embossing folder. I then added Gold Glow Smooch Spritz to the front of the card. I colored over Dasher's body with a Chocolate Chip Marker and went over the antlers with the Versa Mark marker and stamped this onto a piece of Whispe White cardstock.  I heat embossed the antlers with gold embossing powder.  This stamped image was layered onto a piece of Brushed Gold cardstock.    I first tied a piece of Whisper White Organza Ribbon onto the card, but later decided to dye it gold using my retired Gold Metallic ink.  To do this, I too a small piece of a Stamping Sponge and layed the ribbon on top of the ink pad.  I held the ribbon down with the sponge and held the end of the ribbon in my fingers and  ran the ribbon over the stamp pad a few times until I got the coverage I wanted.  I let it dry for a few minutes and then tied it onto my card.  I like this look better, and dying ribbon is easy using this technique. 

To make today's card I used the following:
Cardstock:  Baja Breeze #111352, Whisper White #100730, Brushed Gold #102935
Ink:  Metallic Gold (retired),
Markers:  Chocolate Chip #100071, Versa Mark #100901
Stamp Set:  Dasher #116816, Teeny Tiny Wishes #115370
Ribbon:  Whisper White Organza #114319
Accessories:  Stamping Sponge #101610, Big Shot Machine #113439, Northen Flurry Embossing Folder #120902, Gold Glow Smooch Spritz #118770, Gold Embossing Powder #109129, Heat Tool #100005
Punch:  Small Corner #119871

Friday, November 12, 2010

Embossed Joy Punch

A mixture of silver and gold embossing powder on the ornaments for a little bit of sparkle and shine.

To make today's card I started with a card base of Basic Gray cardstock, followed by a layer of Brushed Gold, and then an embossed layer of Whisper White.  I stamped my Joy ornament with Versa Mark ink and covered half of the orament in Gold Embossing Powder and heated it with my Heat Tool, and then embossed the other half of the ornament in Silver Embossing Powder and heated it.  Some Rhinestone Jewels and Whisper WhiteOrganza Ribbon were added for embellishment.  The two toned embossing goes well with the cardstock layers and looks even better in person. 

To make today's card I used the following:
Cardstock:  Basic Gray #121055, Brushed Gold #102935, Whisper White #100730
Ink:  Versa Mark #102283
Stamp Set:  Delightful Decorations #116517
Ribbon:  5/8" Whisper White Organza #114319
Punch:  Ornament #119847
Embellishment:  Rhinestone Jewels #119246
Accessories:  Gold Embossing Powder #109129, Silver Embossing Powder #109131, Heat Tool #100005, Big Shot Machine #113439, Northern Flurry Embossing Folder #120902 (Holiday Mini)

Thursday, July 29, 2010

All That Glitters

Want to add a little sparkle to your card, try Stampin' Glitter and your ordinary card turns into a wow card!

First stamp your image with Heat & Stick Powder, then cover it with glitter, and heat.  So simple, yet so elegant.

Heat Tool Tip:  Whenever I use my heat tool, whether to emboss or add glitter, I always run my Embossing Buddy over my cardstock to reduce static.  It keeps those stray pieces off of your project.

To make today's card I used the following:
Cardstock:  Rose Red #102544, Basic Gray #121044, Whisper White #100730
Stamp Set:  Medallion #115223
Ribbon:  Basic Black 5/8" Grosgrain #115605
Accessories:  Heat Tool #100005, Embossing Buddy #103083, Heat & Stick Powder #100625
Embellishment:  Fine Cosmo Glitter #108796


Thursday, May 27, 2010

My Favorite Things


The Fifth Avenue Floral Stamp Set is quickly becoming one of my favorite things. I love the large flowers that are great for creating backgrounds(see the card I posted on May 22nd), and I really like how the image pops when it is embossed, as seen in today's cards. I don't know which card I like better. The first one I made by using Versa Mark Ink to stamp the image all over a piece of Whisper White Cardstock and embossing it with White Embossing Powder and my Heat Tool. I then took my brayer and rolled over the images in Pumpkin Pie ink. As you can see the embossed images did not pick up the ink which really made them stand out. I layered this on top of another piece of Whisper White Cardstock, and used Pumpkin Pie Cardstock as my base. A piece of Whisper White Organza ribbon and the sentiment finished the card. I looked at it for awhile and then thought I would try one doing the same steps but instead of a whole layer of flowers I cut two out and placed them on a piece of Whisper White Cardstock. I thought it needed just a bit more color so I added the Photo Corners in Chocolate Chip Cardstock, and placed this layer on Kraft Cardstock and Pumpkin Pie Grosgrain Ribbon, another one of my favorite things. As you can see you get two totally different looks. Let me know which one is your favorite. And as always, have fun experimenting because you never know what you may come up with!

For the first card I used:
Cardstock: Whisper White #100730, Pumpkin Pie #105117, Chocolate Chip #102128
Ink: Versa Mark #102283, Pumpkin Pie #105216
Punches: Scallop Oval #114889, Modern Label #116630
Stamp Sets: Fifth Avenue Floral #113734, Warm Words #115108
Embellishment: White Embossing Powder #109132
Accessories: Heat Tool #100005, Brayer #102395
Ribbon: Whisper White Organza #114319

For the second card:
Cardstock: Whisper White #100730, Chocolate Chip #102128, Kraft #102125
Ink: Versa Mark #102283, Pumpkin Pie #105216, Chocolate Chip #100908
Punch: Photo Corner #109042
Stamp Sets: Fifth Avenue Floral #113734, Teeny Tiny Wishes #115370
Ribbon: Pumpkin Pie 1 1/4" Striped Grosgrain #115616
Embellishment: White Embossing Powder #109132
Accessories: Heat Tool #100005, Brayer #102395

Wednesday, May 26, 2010

Congratulations!


One of the many perks of being a Stampin' Up demonstrator is the wealth of information available from the company and fellow demonstrators. We have our own web-site where talented men and women post pictures of their cards and projects. We are encouraged to Case each other's work (Copy and Share Everything) and when I needed some new inspiration for wedding cards, (I have 4 to attend in the next few months), I knew that inspiration was only a click away. I would like to give credit to Shauna Mikuliak for her design that I based today's card on. After changing a few things I came up with a wedding card that I really love.
I started with a base of Whisper White Cardstock, layered with Brushed Gold and Bride Specialty Designer Series paper. A smaller layer of Brushed Gold and Whisper White were used for the sentiment which I embossed with Gold embossing powder. This really makes it stand out and gives the card an elegant look. I punched two hearts with my Full Heart Punch and then ran them through my Big Shot using the Polka Dot Impressions Folder. I hope the Bride and Groom like it as much as I do.

To make today's card:
Cardstock: Whisper White #100730, Brushed Gold #102935
Designer Series Paper: Bride #115669
Stamp Set: Well Scripted (Occasions Mini)
Ink: Versa Mark #102283 used with Gold Embossing Powder #109129
Punch: Full Heart #113693
Accessories: Big Shot Machine #113439, Textured Impressions Folder Perfect Polka Dots #117335 (Occasions Mini - will be carried over in the 2010-2011 Idea Book & Catalog)

To join my team of Independent Stampin' Up Demonstrators and receive wonderful benefits from the company as well as access to fellow demonstrators who share their creativity and knowledge you can click the Join My Team button on my blog, send me an e-mail, or give me a call. I will be happy to work with you, and help you get your business started and start you off on your own journey of creativity and fun!

Monday, May 10, 2010

Oval Scallop Frame


As you can probably tell from a lot of my posts, I love my Big Shot Die Cut Machine. There is such a large selection of big dies, texture plates, embossing folders, and embosslit dies, in a wide variety of shapes, sizes, and patterns that I use it almost daily. When I joined Stampin' Up as an Independent Demonstrator it was the first thing I added to my already vast collection of products. I use it not only to add layers or textures to my cards, but for gift bags and boxes, shower and wedding favors, special holiday gifts and so much more. A great way for you to purchase your own machine is to host a workshop and use your hostess credits towards the purchase price, or join my team of Independent Demonstrators and receive it and any products you purchase at 20% off. Ask me for details or stop by to try it out for yourself.

For the get well card posted today I used the Oval Scallop Frame. When cutting the frame you can use both the inner oval and the outer scallop frame together, or you can just use one by itself. First I cut with a piece of Bella Bleu Designer Series Paper, and then a piece of Not Quite Navy Cardstock, and used only the frame from the Bella Bleu and the oval from the Not Quite Navy. I saved the pieces I didn't use and will have a frame of Not Quite Navy and an oval of Bella Bleu for another card. I added a few butterflies cut from Beautiful Wings Embosslits Die and sponged a little bit of Not Quite Navy ink on them and then embossed the sentiment by stamping it with Versa Mark Ink and then heat embossing with White Embossing Powder to finish the card.

To make the card I used the following:
Cardstock: Not Quite Navy #100867, Very Vanilla #106530
Designer Series Paper: Bella Bleu #113974
Ink: Versa Mark #102283
Big Shot Machine #113439, Oval Scallop Frame #114521, Beautiful Wings Embosslite Die #118138
White Embossing Powder #109132, Heat Tool #100005
Stamp Set: Sincere Salutations #115068

Monday, May 3, 2010

Elements of Style


The Elements of Style Stamp Set from the Summer Mini Catalog is so versatile and can be used for so many different occasions. Thanks to Linda Rodenberg for coming up with the design. I made my version of this card for my mother for Mother's Day, and since I know she doesn't go on line it was safe to post it before she will receive it. For the image, I stamped it in Basic Black Ink, and then filled in the flowers using my blender pen dipped in the ink colors listed below. The blender pens work great when you want to add more than one color to your project. They color on as light or dark as you want, and you can really blend the colors just right. Next I went over the entire image with my versa mark marker and then added clear embossing powder to it and used my heat tool to emboss the image giving it a clear, shiny look. I added my sentiment, embellished it with a bitty button, and used Dimensionals to pop it up. For the finishing touch I sponged a little bit of Rose Red Ink around the edges.
In the picture you don't get the full effect of the embossing or the sponging, but it really adds some sparkle and gives it a really polished look.

To make the card I used the following Stampin' Up products:
Stamp Set: Teeny Tiny Wishes #115370
Cardstock: Kraft #107070, Whisper White #106529, Rose Red #102544
Ink: Rose Red #101778, Regal Rose #105211, Pumpkin Pie #105216, Old Olive #102277
Punches: Itty Bitty Shapes #118309 (Punch Pack from the Summer Mini), Modern Label #116630
Ribbon: Whisper White Organza #114319
Accessories: Versa Mark Marker #100901, Clear Embossing Powder #109130, Heat Tool #100005, Stamping Sponge #101610, Dimensionals #104430