Showing posts with label Punch Cards. Show all posts

Friday, June 14, 2019

Above the Clouds


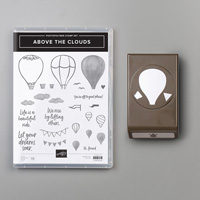
Another fun new bundle in the annual catalog is called Above the Clouds.  It comes with a 19 piece photopolymer stamp set and matching Hot Air Balloon Punch.  I love when new punches are introduced in the catalog, since they are easy to transport to a class, or take with you if you want to stamp away from home.  No cutting machine needed, just a little bit of creativity.

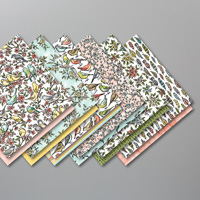
I paired this bundle up with a piece of Bird Ballad Designer Series Paper, since I thought the birds flying in the background went well with my hot air balloons.  I stamped the balloons using Memento Black Ink, and colored them in using my Stampin' Blends.  I attached them onto my Whisper White layer using dimensionals,  and added my sentiment to finish the card.


The following were used:

Thursday, March 31, 2016

Flower Medallion Birthday


When the new Occasion Catalog came out I was so busy creating with all of my new products, but I wanted to start using some of my other favorites from the Annual Catalog.  Soon, some of these products may be retiring, and I want to make sure to use them at my classes and for my own personal use, just in case they aren't being carried over into the new Annual Catalog on June 1st.

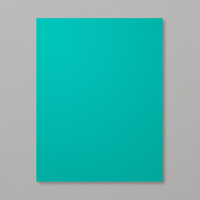
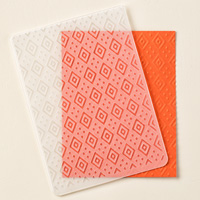
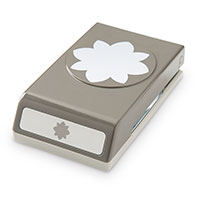
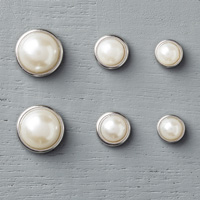
My card base is Very Vanilla Card Stock that I layered with a piece of Bermuda Bay Card Stock embossed with my Boho Chic Embossing Folder.  I punched my flowers with the Flower Medallion Punch and Bohemian Designer Series Paper.  I added some Metal Rimmed Pearls to the center of each flower and placed on a piece of retired ribbon.  My sentiment is from the Tag Talk Stamp Set and was stamped using Blackberry Bliss Ink and punched out with the Label Bracket Punch.


Monday, December 17, 2012

Quick Birthday Card


I like to prepare some cards for my stamp class that don't require a lot of stamping or cutting, and I had a request for a feminine birthday card using circles.  So this is the design I came up with that was quick and also used the requested design.
 
My card base is Pink Pirouette Card Stock that I layered with a piece of Chocolate Chip Card Stock embossed with the Perfect Polka Dots Embossing Folder.  I then used my 1 3/8", 1 1/4" and 1" Circle punches with the Birds of a Feather Designer Series Paper for my design.  I tied some Pink Pirouette 3/8" Taffeta Ribbon and added my Happy Birthday Cake which I also punched out with the 1 3/8" Circle Punch. 
 
The Happy Birthday Cake Stamp is from the Pretty Postage Stamp Set that coordinates with the Postage Stamp Punch, but as you can see here on this card, it also goes with the circle punches too. 
 
The following were used:
Card Stock:  Pink Pirouette #111351, Chocolate Chip #102129
Designer Series Paper:  Birds of a  Feather #126899
Ink:  Raspberry Ripple #126859
Stamp Set:  Pretty Postage #123095 w or #123097 c
Ribbon:  Pink Pirouette 3/8" Taffeta #122981
Punches:  1 3/8 Circle #119860, 1 1/4" Circle #119861, 1" Circle #119868
Tools:  Big Shot #113439, Perfect Polka Dots Embossing Folder #117335


Thursday, September 6, 2012

Quilted Get Well Wishes


By punching squares with the Postage Stamp Punch and coordinating Designer Series Paper,  and placing  them on top of my Whisper White Cardstock I was able to create a quilt pattern for the background on my card.
 
My card was created with a base of Island Indigo Cardstock, and then my added layer with the punches.  To make this layer stand out a bit more I embellished it with the Vintage Wallpaper Embossing Folder.  I also added an additional 2 3/8" Scallop Circle of Island Indigo Cardstock , a 1 3/4" Scallop Circle of Designer Paper, and an Elegant Butterfly, also punched out with the DSP.  Some basic pearls embellished my butterfly, and the get well wishes were added to the bottom of the card.
 
The following were used:
Cardstock:  Island Indigo #122923, Whisper White #100730
Designer Series Paper:  Twitterpated #125406
Ink:  Island Indigo #126986
Stamp Set:  Teeny Tiny Wishes #115379 wood or #127802 clear
Punches:  Postage Stamp #122344, 2 3/8" Scallop Circle #118874, 1 3/4" Scallop Circle #119854, Word Window #119857, Elegant Butterfly #127526
Tools:  Big Shot #113439, Vintage Wallpaper Embossing Folder #120175
Embellishment:  Basic Pearls #119247


Wednesday, June 13, 2012

Birthday Presents


Turn your square punches into birthday presents for a quick, fun, birthday card.

I wanted to keep a masculine theme for the card, so I punched and used the side of Comfort Cafe Designer Series Paper that did not have a floral theme.  To make the ribbon and bows for the presents I used pieces of 1/8" Taffeta Ribbon.  For further embellishment, I embossed my Very Vanilla cardstock layer with the Houndstooth Embossing Folder.  I love when my punches can be used so many different ways.

The following were used:
Cardstock:  Summer Starfruit #126839, Very Vanilla #101650
Designer Series Paper:  Comfort Cafe #126898
Ink:  Summer Starfruit #126991
Stamp Set:  Petite Pairs #122495 wood or #122497 clear
Ribbon:  Early Espresso 1/8" Taffeta #119959, Very Vanilla 1/8" Taffeta #119960
Tools:  Big Shot #113439, Houndstooth Embossing Folder #123134
Adhesive:  Snail #104332, Dimensionals #104430

Monday, July 11, 2011

Simple Pennant Parade

You don't always need a lot of layers to make a cute card, but a few nice punches will help.

Today's card was made with the new In-Color Island Indigo, and the Pennant Parade Stamp Set.  I stamped the pennants in Lucky Limeade Ink, and then punched them out with the Petite Pennants Builder Punch.  Some Whisper White 1/4" Grosgrain Ribbon creates a nice streamer for the pennants to rest on, and one Itty Bitty Button and punch were added for some extra embellishment.  An additional layer of Lucky Limeade punched with the Lace Ribbon Border punch and my sentiment finished the card. 

The following were used:
Cardstock:  Island Indigo #122923, Whisper White #100730, Lucky Limeade #122926
Ink:  Lucky Limeade #122935
Stamp Set:  Pennant Parade #122740 wood or #122742 clear
Punches:  Petite Pennants #122361, Small Oval #120908, Lace Ribbon Border #122362, Itty Bitty Shapes #118309
Ribbon:  Whisper White 1/4" Grosgrain #109025
Embellishment:   Bitty Button #118761

Friday, July 1, 2011

Hello to the New In Colors!

Todays card was made for the simple purpose of introducing you to the New 2011-2012 In Colors.  These five new colors will be available for two years, while the In Colors that were introduced in the 2010-2011 Idea Book and Catalog will be with us for one more year. 

After folding a piece of Whisper White cardstock to form my card, I punched all of the new In Colors with the Lace Ribbon Border Punch which is also new!  I added the stamped sentiment which is from the Summer Mini Catalog and layered it on with punches. 

Oh what fun I am having going through my new catalog.  There are so many wonderful new items.  Not only are there five new added colors, but also new stamp sets, designer papers, punches, ribbons, Big Shot accessories and so much more.  If you would like to purchase your own catalog and become a member of my Coupon Catalog club just send me an e-mail, or leave a comment on my blog and I will get back to you and let you know how the new catalog can be yours. 

For today's card:
Cardstock:  Whisper White #100730, Wisteria Wonder #122922, Island Indigo #122923, Pool Party #122924, Calypso Coral #122925, Lucky Limeade #122926
Stamp Set:  Swurks & Curls Verses #13015 or #123017 (Hostess - Summer Mini)
Ink:  Island Indigo #122937
Punches:  Lace Ribbon Border #122362, 2-3/8" Scallop Circle #118874, 1-3/4" Scallop Circle #119854, 1-3/8" Circle #119860
Accessories:  Dimensionals #104430

Friday, June 24, 2011

Designing with punches!

I saw a pretty card posted by SU demonstrator Diane Oliver and was trying to figure out how she made her flower vase.  After looking at her card for a few seconds I realized that she took the Extra Large Oval Punch and snipped off the ends to create the vase.  Thanks Diane for your inspiration and creativity.  I shared my card with the ladies at Wednesday's Mystery Hostess night and they loved getting different ways to use their punches. 

My card starts with Whisper White cardstock, followed by a layer of Melon Mambo and Whisper White which were both embossed with different embossing folders.  Before I placed my punched vase down, I cut small strips of Old Olive cardstock to create the stems, punched the flowers with the new Blossom Bouquet Triple Layer Punch (Summer Mini), and then put them on the layers.  I used dimensionals for the vase to make it stand out.  The bird punch was cut with a piece of Old Olive Designer Paper from the Brights Paper Stack.  Small pearls were added for extra embellishment to the flowers and bird. 

After looking at the card I thought the vase looked a little plain, so I took a Sponge Dauber and added some Old Olive ink to the vase for a more weathered look.

For today's card I used the following:
Cardstock:  Whisper White #100730, Melon Mambo #115320, Old Olive #100702
Designer Series Paper:  Brights Paper Stack #117155
Ink:  Old Olive #102277
Punches:  Blossom Bouquet Triple Layer #122464, Two-Step Bird #117191, Extra Large Oval #119859
Embellishment:  Pearls #119247
Accessories:  Dimensionals #104430, Big Shot #113439, Square Lattice Embossing Folder #119976, Framed Tulips Embossing Folder #121809, Sponge Daubers #102892, Paper Snips #103579

Monday, March 7, 2011

Square Punch Birthday Card

Here is another square punch birthday card made with Play Date Designer Series Paper.  In a card I posted a few weeks ago I used the same design and paper pack, but just picked a different pattern of paper and sentiment for the center square.    I like the softness of the papers today.  They are not as bold as the ones I used before.

For today's card I started with a base of Old Olive cardstock, followed by matte layers of Chocolate Chip, Old Olive and So Saffron.  The larger squares are Chocolate Chip and the smaller squares are the DSP.  I put all of these layers together using snail adhesive, and then ran them all through my Big shot using the Square Lattice embossing folder.  I love this inlaid embossing technique.  It really gives your card a great textured, polished look.    The square in the middle and the sentiment on the bottom are the only pieces I did not emboss. 

The following were used for today's post:
Cardstock:  Old Olive #100702, Chocolate Chip #102128, So Saffron #105118, Whisper White #100730
Designer Series Paper:  Play Date #117168
Stamp Set:  Cute by the Inch #116992 wood or #120130 clear (Level 2 Hostess),  Teeny Tiny Wishes #115370
Ink:  Old Olive #102277
Punches:  1 1/4" Square #119865, 1 3/8" Square #119877, Word Window #119857, Modern Label 3119849
Accessories:  Big Shot #113439, Square Lattice Embossing Folder #119976


Sunday, October 31, 2010

Simple Punch Card

A quick Sunday post = a quick punch card.

Actually this card started out as something else, but I made a mistake and needed to cut some paper off of the left side of the card front, so instead of starting all over again, or throwing it out completely, I punched a piece of Brights Designer Paper with the Scallop Ribbon Border punch and placed it on the left side making it look like this is what I wanted to do all along.  So now the card has a unique front opening!  It doesn't really matter that the front of the card is smaller than the back, no one else will know that that is now what you intended to do in the first place.

The rest of the card was made with five punches from the Decorative Label punch.  The punch with the sentiment was also sponged with Daffodil Delight and Melon Mambo ink for added dimension.

To make today's card I used the following:
Cardstock:  Whisper White #100730
Designer Series Paper:  Brights Paper Stack #117155
Ink:  Daffodil Delight #119667, Melon Mambo #115656
Stamp Set:  Occasional Quotes #117048 wood mount, or #120142 clear mount (Hostess Level 3)
Punches:  Decorative Label #120907, Dotted Scallop Ribbon Border #119275
Accessories:  Sponges #101610, Dimensionals #104430

Tuesday, September 7, 2010

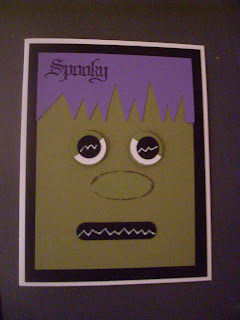
Monster Halloween

Grab a few punches and a pair of good scissors and you are on your way to making this Monster of a Halloween card. 

I started with a card base of Whisper White cardstock, and a layer of Basic Black.  For the monster's face I used Old Olive cardstock, and Lavendar Lace Cardstock (retired) for his hair.  To make the bangs I just cut irregular shaped triangles all the way across.   For the eyes I punched two Old Olive circles and two Whisper White circles with the 3/4" circle punch.  I cut the Whisper White circles in half and placed them over the Old Olive Circles.  Next I used the 1/2" Circle Punch for the black circles in the center of the eyes. The punch for his nose is the 1 3/8" Oval, and Word Window punch was used for the nose.  I took the uni-ball Signo Gel Pen to add the lines to the eyes and mouth.  The only stamp used was the Spooky stamped in the corner.

I got the idea for this from my Upline Maureen Stivala when she did a workshop for me last year before I became a demonstrator.  We made a similar face for treat bags, and I just modified it into a card.  So if you don't have a lot of Halloween stamps, just get creative with some punches and scissors and see what you can come up with too. 

Check back tomorrow to see the Owl punch turned into a Ghost!

For today's card I used the following:
Cardstock:  Whisper White #100730, Old Olive #100702, Basic Black #121045, Lavender Lace (retired)
Ink:  Basic Black #101179
Stamp Set:  Wicked Cool #118738 wood mount or #120600 clear mount
Punches:  Word Window #119857, 1 3/8" Oval #119863, 3/4" Circle #119873, 1/2" Circle 119869
Embellishment:  uni-ball Signo Gel Pen #105021
Accessories:  Paper Snips #103579

Thursday, August 12, 2010

Hoot, Hoot!

Stampin' Up! keeps on coming up with some really cute punches.  I used the Two-Step Owl Extra Large punch, and 2 3/8" Extra-Large Scallop Circle punch for today's card.

I used Blushing Bride for my card base.  I wanted the matte layer of Crumb Cake to have a grainy look so I ran it through my Big Shot and used one of the #4 Texture Plates.  I sponged a little bit of Early Espresso ink to this layer also, to bring out the impression. The owl is sitting on Little Leaves (a sizzlits die), and the pink flowers were punched from Itty Bitty Shapes punch. 


To make today's card I used the following:
Cardstock:  Blushing Bride #119796, Crumb Cake #120953, Early Espresso #119686, Old Olive #100702
Ink:  Early Espresso #119670
Ribbon:  Old Olive 5/8" Grosgrain #109054
Punches:  Two Step Owl #118074, Itty Bitty Shapes Punch Pack #118309, 2 3/8" Extra-Large Scallop Circle #118874
Accessories:  Big Shot Die Cutting Machine #113439, Little Leaves Sizzlits Die #114511, Texture Plates Kit #4 #114531, Dimensionals #104430, Sponges #101610
Embellishment:  uni-ball Signo Gel Pen #105021

My Stamping Time Saver - If you notice I did not put a sentiment on the card.  When I have extra time I make several cards and leave them blank.  Then, when I have an event coming up I have a selection to choose from that were not made for one specific occasion.  Also, if I really like the card I make two at the same time.  I already have all of the supplies and layout handy and it saves time in the long run.

Monday, July 12, 2010

Keeping it simple!

I love making cards and having a supply on hand for whatever occasion comes up, and some days I have more time than others to experiment and create. On those days when I am short on time I just grab some of my favorite ribbon, Designer Series Paper, my Curly Label Punch and then run my card front through my Big Shot, and in a few short minutes I have created a card that can be used for a variety of reasons. If I need a birthday, thank you, thinking of you, get well, friend, sympathy, wedding, or anniversary card, all I need to do is add the sentiment and I am done. I love this look and it was so easy to make without sacrificing style and elegance.

To make today's card I used the following:
Cardstock: Whisper White #100730
Designer Series Paper: Greenhouse Gala #117167
Ribbon: Old Olive 5/8" Grosgrain #109054
Punch: Curly Label #119851
Accessories: Big Shot Machine #113439, Perfect Polka Dots Embossing Folder #117335


Sunday, June 6, 2010

Circle Punch Card


I love how Stampin' Up's! Cardstock, Designer Series Paper, and Ribbon coordinate. It makes it really easy to make a card using just a few tools. I started by using a piece of Rich Razzleberry cardstock for the card base, and then added a piece of Certain Celery Cardstock for my layer. I punched out circles in Basic Black cardstock using the 1 3/8" Circle Punch and then Cottage Wall Designer Paper was layered on top of the black circles using my 1 1/4" Circle Punch. A little flower from the BoHo Blossoms Punch was placed on top of a circle of Whisper White Cardstock. The Fabulous Friends sentiment is from the Oval All Stamp set, and as you can see it can be used with more than just oval punches. Rich Razzleberry Polka-Dot Grosgrain Ribbon was tied on the side.

Did you know: When looking at the Designer Series Paper in the Idea Book and Catalog, a list of coordinating cardstock colors is printed next to the name of the paper. This makes it really easy to select the coordinating colors.

To make this card I used the following:
Cardstock: Rich Razzleberry #115316, Certain Celery #105125, Whisper White #100730
Designer Series Paper: Cottage Wall #115671
Ink: Rich Razzleberry #115658
Stamp Set: Oval All #113780
Ribbon: Rich Razzleberry Polka-Dot Grosgrain #115613
Punches: 1 3/8" Circle #104401, 1 1/4" Circle #104403, BoHo Blossoms #110711
Embellishment: Dimensionals #104430 (for the small flower_

Wednesday, May 19, 2010

Punch Cards


One of my customers asked if I could make cards using the two punches she recently purchased - the Curly Label Punch and Large Oval Punch and this is what I came up with.

The first card uses the Curly Label and Butterfly Punch. The only stamp set was Teeny Tiny Wishes for the sentiment. I love the colors pink and brown together, so I used Pretty in Pink and Chocolate Chip cardstock for the Curly Label punch, some scrap pieces of Sending Love Specialty Designer Series Paper for the butterflies (from the Occasions Mini) and layered all of this onto Very Vanilla cardstock, added some Chocolate Chip ribbon to finish the card front which I then placed onto my card base using Kraft cardstock.
The second card uses the Large Oval, Large Star, Star, Word Window, and Modern Label Punch. The only stamp set was Teeny Tiny Wishes for the sentiment. I used Bashful Blue cardstock for the base of the card, Going Gray for the layer, Ballet Blue and Basic Gray for the oval punches, and mixed the colors for the star and word punches. So with a little bit of imagination you can make cards only using your punches.
Let me know what you think, and if you come up with some creative punch cards of your own I would love to see them.


For the first card I used the following:
Cardstock: Kraft #102125, Pretty in Pink #100459, Chocolate Chip #102129, Very Vanilla #101650
Designer Series Paper: Sending Love Specialty (Occasions Mini) retired
Ribbon: Chocolate Chip 1/4" Grosgrain #111367
Punches: Curly Label #112208, Butterfly #116629
Stamp Set: Teeny Tiny Wishes #115370
Ink: Chocolate Chip #100908
For the second card:
Cardstock: Bashful Blue #105120, Basic Gray #108588 (neutral pack), Basic Gray #108692, Ballet Blue #100613
Punches: Large Oval #107305, Word Window #105090, Modern Label #116630, Large Star #110710, Star #109045
Stamp Set: Teeny Tiny Wishes #115370
Ink: Basic Gray #109120