Wednesday, June 29, 2016

Floral Phrases


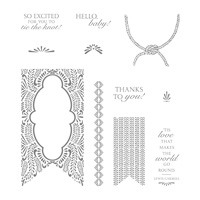
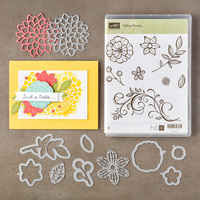
The Floral Phrases Stamp Set used in my card coordinates with the Detailed Floral Thinlits Dies to save you 10%.  These are two of my favorite products in the new catalog.  Today I just used the stamp set, but I plan on making another card with the thinlits for my July stamp class.  The one I made in June was very popular so I will come up with another design that incorporates both products.

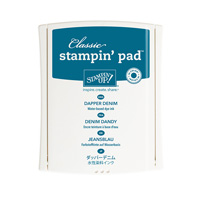
My card base of Whisper White Card Stock was layered with a piece of Dapper Denim.  I added another Whisper White piece and stamped my images using Dapper Denim ink.  My Stamp-a-ma-jig was used to help me get my images aligned properly.  A few Rhinestones were added for a bit more embellishment and finished my card.

Tuesday, June 28, 2016

Beautiful Banners


The Beautiful Banners Stamp Set coordinates with the Banners Framelits Dies.  You can make cards, home decor, and so much more with these two pieces.  The card I made can be used for either a wedding, friendship, or anniversary card and that makes it even better.  I didn't stamp the inside so I can decide what I want to use it for when the proper occasion arises.

My card base of Soft Sky Card Stock was embossed with the new Petal Burst Embossing Folder.  To that I added one of the new Delicate White Doilies which I placed onto my card front with Dimensionals.  I cut one Banner Framelit using Bermuda Bay Card Stock and then stamped my images onto a piece of Very Vanilla Card Stock and cut that out with a smaller framelit. Before I put these two pieces together I tied on a piece of 1/8" Silver Ribbon.  

If you need help aligning your images the Stamp-a-ma-jig tool works great.  This tool helps you position your stamped image exactly where you want, and it comes with instructions, but is very easy to use.  


Wednesday, June 22, 2016

My June Paper Pumpkin - Alternate Ideas


A few days ago I posted the Stampin' Up!  video showing how to put together the June Paper Pumpkin Kit.  I did make one of the original banner cards as shown in the directions, but I knew there would not be enough letters to make all of the cards this way.  I came up with a few different cards using only the materials in the kit so any one who is new to stamping and might have received the kit this month during the $5 promotion could use just the materials included.

I hope you get inspired by my cards to create some new ones of your own.


This is the only card I made using the directions for wrapping the card with the HAPPY banner.  The other five are other suggestions.


The last photo shows all of the materials I still have left over for other projects.

As you can see I have a clear block, two ink spots, a photopolymer stamp set, baker's twine, washi tape, a lot of sequins and stars, and plenty of banners and gold letters for other options.  The green envelopes will go with my cards. 

Paper Pumpkin kits are a surprise each month, and as you can see you can always just follow the directions, or come up with some new ideas on your own.  If you would like to try Paper Pumpkin you can click the Paper Pumpkin link in the upper left hand column of my blog.  If you have any questions or would like to share some of your own ideas with me feel free to send me an e-mail or leave a comment.  


Saturday, June 18, 2016

June Paper Pumpkin Video


A really new and creative design for banner cards is what the June Paper Pumpkin kit is all about. Here is the video by Stampin' Up! showing you how to put it together.

Now, if you want to change things up a bit and not make all of your cards the way shown in the video and on your directions here is another idea by Stampin' Up! demonstrator Bev at stampwithbev.blogspot.ca


Like every monthly kit that comes to you,  you might love the ideas and follow the directions exactly or you might think you want to try something different with the materials, and that is what makes these kits so much fun.  When my kit arrives I will decide how I want to put the cards together and if I decide to change things up a bit I will post more pictures.  

Friday, June 17, 2016

Blooms & Bliss


The Blooms & Bliss Designer Series Paper is so pretty, it looks like you hand stamped the flowers and leaves yourself.  The piece I used worked well with the Falling Flowers Bundle which includes the May Flowers Framelits and Falling Flowers Stamp Set.  Before I added the flowers and leaves I placed a piece of Sweet Sugarplum Ribbon around the layer for a bit more embellishment, but didn't tie it into a bow because there was already so much pattern and design on the card.  

My sentiment, which is from the Birthday Blossoms Stamp Set was cut out with one of the new Oval Framelits and placed onto my layer with Dimensionals.  

The following were used: