Thursday, July 31, 2014

Sassy Salutations


Sassy Salutations Stamp Set is not new , it has been in a few catalogs, but it is still one of my favorites.  The large sentiments, and pretty font make it a go to stamp set for me when I'm looking for a large sentiment.  With such a large variety of punches and framelits to choose from, you can accent your sentiment and let the words express themselves.
 
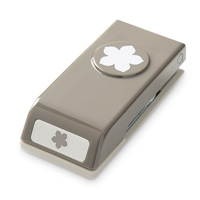
I layered two Deco Label Framelits around my sentiment, added some pretty coordinating ribbon and Designer Series Paper, and two Petite Petal Flowers.  A few dimensionals popped up my layers and finished the card.  If you are looking for a good value when purchasing Designer Series Paper, why not consider the Paper Stacks that you can get in all of the color families.  You get 40 sheets of paper in all 10 colors in the color family, 2 each of 2 double sided designs, or 40 sheets, 4 each of 2 double sided designs in the In Color Collection.
 
The following were used: 


Wednesday, July 30, 2014

Timeless Talk


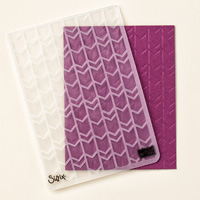
Punch a circle in your to layer and place your sentiment behind it to really make it stand out.  Add an embossed layer with some additional punching and your card is almost finished.  Just add a few Candy Dots to the top and your done.
 
I also added a layer of Whisper White Card Stock to the inside of my card to make it easier to write my own personal sentiment.  I usually do this when the Card Stock I used for the card base is dark.


The following products were used:

Monday, July 28, 2014

Block Background


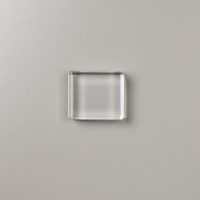
Try creating a different background using one of your Clear Blocks.  Tap your block lightly onto your ink pad to get less coverage, or tap several times to get darker coverage.  Have fun experimenting with all of the different sized blocks and you can come up with a lot of different backgrounds. 


The following products were used:

Thursday, July 24, 2014

Altered Class Cards


Original Card

Two new cards with the same materials.

 
Just wanted to share a few more altered class cards. The first card shows the original card for class, and the last two show different cards using the same materials. When I have leftover cut materials, sometimes I just make all of the same card, but I thought with this design I would just rearrange my layers, add a few more Hexagons and  different sentiments and I have three different cards. 
 
I used the following materials in all three cards:
Card Stock:  Lost Lagoon #133679, Crumb Cake #120953, Hello Honey #133678, Whisper White #100730
Designer Series Paper:  Moonlight Paper Stack #133701
Ink:  Lost Lagoon #133644
Stamp Sets:  Six-Sided Sampler #130953 w or #130956 c, Honeycomb Hello #134075 w or #134078, Papillon Potpourri #132058 w or #123759 c
Punches:  Hexagon #130919, Elegant Butterfly #127526
Embellishment:  Brights Candy Dots #130931
Tools:  Big Shot #113439, Decorative Dots Embossing Folder #133520

Monday, July 21, 2014

A Big Thank You!


Yes, that is a big Thank You.  The images and sentiments in the Cheer to Love Stamp Set are great.  I like the larger size because sometimes the sentiment is what really is important.
 
My card base is Old Olive Card Stock that I layered with Tempting Turquoise Card Stock and some Sweet Taffy Designer Series Paper.  I stamped my image with Tempting Turquoise Ink onto Whisper White Card Stock and cut it out with an Oval Framelit.  I layered a larger Old Olive Oval Framelit and some Old Olive 1/8" Taffeta Ribbon under the sentiment to finish my card.
 
The following were used:
Card Stock:  Old Olive #100702, Tempting Turquoise #102067, Whisper White #100730
Designer Series Paper: Sweet Taffy #133683
Ink: Tempting Turquoise #126952
Stamp Set:  Cheers to Love #135371 w or #135374 c
Ribbon:  Old Olive 1/8" Taffeta #119256
Tools:  Big Shot #113439, Ovals Collection Framelits #129381

Saturday, July 19, 2014

July's My Paper Pumpkin


Just received my July Paper Pumpkin last week and wow I love it.  Materials to make 6 cards and 6 gift boxes with a Blackberry Bliss Ink Spot, a spool of Whisper White Satin Ribbon, Whisper White Linen Thread, 6 envelopes, 1 sheet of silver stars, 2 sheets of white circles with the holes punched through the top so you can easily attach them to your gift box, 3 sheets of stickers which include the pretty blue stars, the WISH letters and the band at the bottom of my card.  If that wasn't enough a Photopolymer Stamp Set that includes 10 stamps.  You also receive instructions on how to put everything together.  What a great bargain.  All of this for $19.95 plus tax. 

If you think you would like to receive these surprise kits in the mail now would be a great time to try it.  If you sign up for My Paper Pumpkin now you receive your first two months at half off.  That means you would only be paying $9.98 plus shipping for the first two months.  In your first kit you also receive a clear block that you can use with all of your future kits.  This special runs from now until September 10, 2014.  You can click the link in the upper left hand column of my blog to take you directly to my "My Paper Pumpkin" site.  You will need to enter code HALFOFF2 to receive this discount on your first two months.  If you already have a relationship with another Stampin' Up! Demonstrator contact her for her direct link, otherwise I would be happy to help you.  If you sign up under me you will receive as an added thank you from me, your choice of either a Wood Mount or Clear Mount Stamp Case that you can use to keep all of your left over supplies. 

If you would like more information about My Paper Pumpkin please leave me a comment or send me an e-mail.  This surprise kit changes each month and they make really great gifts too.  You can sign up to have someone receive them each  month if you would like to give them as gifts, and you can cancel or skip a month at any time too. 
July Paper Pumpkin Kit

Card made with the kit - you get materials to make 6 cards with matching envelopes

Gift box - you get materials to make 6 gift boxes


I love the blue tissue paper that comes in the kit and I used it and my Fringe Scissors (not included in the kit) to make this pretty bow.

Paper Pumpkin makes great gifts.  Everything comes in this cute orange box.

Friday, July 18, 2014

Bloom with Hope


Would you like to be able to purchase the pretty Bloom with Hope Stamp Set that I used in  today's card?  It is one of the Hostess sets in the new catalog and with an order of at least $150 this set could be yours at a great discount.   It is great for coloring with your markers or the new Blendabilities and it is an 11 piece set with beautiful images and sentiments. 
 
My card base is Pool Party Card Stock that I layered with a piece of Pear Pizzazz and Pool Party Designer Series Paper from the Subtles Paper Stack.  I also added some Pear Pizzazz 3/4" Chevron Ribbon to this layer before I placed my stamped and cut sentiment.
 
I inked my sentiment with Memento Ink and then colored the images in using my Pool Party and Pear Pizzazz marker and cut it out with a Floral Frames Framelit.   I also sponged some additional Pear Pizzazz ink to the edges and placed it onto my card using dimensionals.
 
The following were used:
Card Stock:  Pool Party #122924, Pear Pizzazz #131201, Whisper White #100730
Designer Series Paper: Subtles Paper Stack #130135
Ink: Memento #132708, Pear Pizzazz #131180   Markers:  Subtles #131263 (Pool Party and Pear Pizzazz)
Stamp Set:  Bloom with Hope #133949 w or #133952 c
Ribbon:  Pear Pizzazz 3/4" Chevron #130011
Tools:  Big Shot #113439, Floral Frames Collection Framelits #127012
Adhesive:  Dimensionals #104430, Snail #104332
 

Wednesday, July 16, 2014

Flower Patch


The Flower Patch Stamp Set and coordinating Flower Fair Framelits that I used in my card can be purchased together as a bundle to save you 15%.  So many great Photopolymer Stamps that are easy to work with when doing 2 Step Stamping.  They stick really well to your blocks and because they are clear you see exactly where you are stamping.
 
My card base is Whisper White Card Stock that was layered with another piece of Whisper White. I stamped my large flower in Crisp Cantaloupe ink and cut it out with the coordinating Framelit.  I then cut another smaller Framelit using Calypso Coral ink and placed this in the center of my flower.  Another smaller Framelit in Crisp Cantaloupe and a small pearl were added.  My larger leaves were stamped in Pistachio Pudding Ink and then I used Wild Wasabi ink for the smaller leaves.  Some smaller flowers were stamped with Calypso Coral ink and a few more pearls were added.  I finished the card by adding a piece of Calypso Coral 1/2" Seam Binding.
 
The following were used:
Card Stock: Whisper White #100730
Ink:  Crisp Cantaloupe #131176, Calypso Coral #126983, Pistachio Pudding #131177, Wild Wasabi #126959
Stamp Set:  Flower Patch #134207 P - Bundle number with the coordinating Framelits is #136788*
Ribbon:  Calypso Coral 1/2" Seam Binding #134569
Tools:  Big Shot #113439, Flower Fair Framelits #133731*
Embellishment:  Pearl Basic Jewels #119247

Monday, July 14, 2014

Age Awareness


Love the large lettering in the Happy Birthday in the Age Awareness Stamp Set.  It is a Photopolymer  Set so the images stick really well to your blocks for easy placement, and you don't need to add much more to your card when the cutte sentiment says so much.
 
My card base is Daffodil Delight Card Stock that I embossed with the Large Polka Dot Embossing Folder.  I then tied some Blackberry Bliss 3/8" Stitched Satin Ribbon around the card before I added my stamped sentiment and swirls.  I usually like to add some more embellishments or Designer Series Paper to my cards, but I really didn't think it needed anything else. 
 
The following were used:
Card Stock:  Daffodil Delight #119683, Whisper White #100730
Ink:  Daffodil Delight #126944,  Blackberry Bliss #133642
Stamp Set:  Age Awareness $135381 P
Tools:  Big Shot #113439, Large Polka Dot Embossing Folder #133739
Ribbon:  Blackberry Bliss 3/8" Stitched Satin #133668