Showing posts with label Gift Boxes. Show all posts

Monday, December 23, 2019

Mini Curvy Keepsake Box Dies

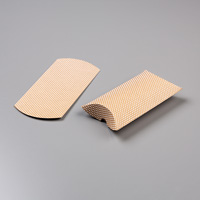
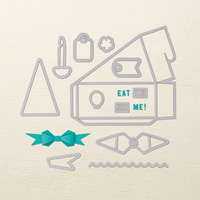
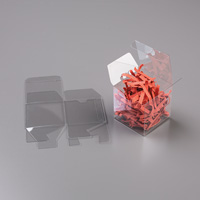
I know it's not a holiday project, but I was asked to make 50 favors for someone who is turning 40.  They love bunnies, and they wanted a little treat to hand out to everyone who came to the party.  I knew the Mini Curvy Keepsake Box would be the perfect little birthday favor.


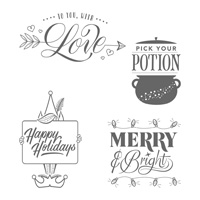
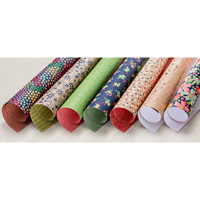
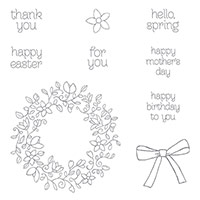
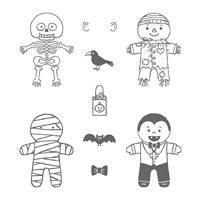
I used an assortment of card stock to fit the birthday theme, cut out my bunny from a retired set and added my birthday tag, made with the Make a Difference Stamp Set.  The box holds one Lindt Chocolate Truffle and will be a nice treat for all the party goers.

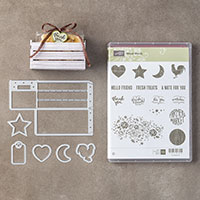
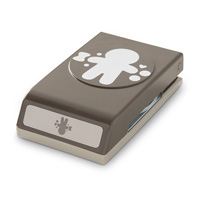
The die will be carrying over into the next catalog so you still have time to order it.  It cuts with one 6 x 6 sheet of paper and no adhesive needed to put it together.  Really simple to cut and put together and I had 50 cut and assembled, without the stamping and additional tags, in an hour.

Wednesday, November 13, 2019

Pillow Box Christmas Treat


If you don't have a lot of time to prepare small holiday gifts, you can use the Kraft Pillow Boxes that Stampin' Up! carries in the annual catalog.  I filled these with holiday candy, added a strand of leaf ribbon, and tied the box closed with Real Real Ruched Ribbon from the Holiday Catalog.

I added my sentiment, and punched it out with the Pretty Label Punch and tied it onto my red ribbon with some Linen Thread.  

These went together really quickly and are nice for co-workers, teachers, and small gifts for friends.

The following were used:

Monday, October 9, 2017

Window Box Night Light or Luminaria

The Window Box Thinlits create a really nice box to put in a battery operated tea light that turns it into a night light or holiday luminaria.    The thinlits come with three different cut outs for the windows on the sides, and I choose the small dots for my Merry & Bright Luminaria.  I cut it out using retired designer series paper, but liked the thickness of the old kraft paper so if you want to use current product the thick Whisper White and Very Vanilla would work nicely, and you could add Designer Series Paper or stamp on it before you cut it out.

I used Fast Fuse Adhesive to put the box together, and the trick to making it easier is to cut off the two side tabs on the bottom layer before putting it together.  I do not adhere the top lid down because I want to be able to take the candle out when the battery dies and be able to replace it without tearing the box.

I finished the top by adding some wooden snowflakes that were left over from a past Paper Pumpkin kit, added my tag, tied the bag with retired Gold Satin Ribbon.  I think these will be a nice addition to the other holiday items I have made for my Craft Fairs, and I plan on keeping one for myself to put in my powder room as a nice night light.

Note -  In the other boxes  that I made, to decorate the top I cut out snowflakes using Gold Glimmer Paper and the three  snowflakes in the Seasonal Layers Thinlits.  They added a nice shimmery addition to the top of the box as well.


 I couldn't get a good picture of what it looks like when it is dark, but the light shines nicely through the small holes.

The following current products were used:

Thursday, June 1, 2017

Wood Crate


How cute is the new Wood Crate Framelit.  It coordinates with the Wood Words Stamp Set and can be purchased in a bundle to save you 10%.

I cut my crate out using Crumb Cake Card Stock and decorated the front by cutting a lace doily in half and adhering my sentiment.  I punched the sentiment out with the Classic Label Punch, and tied my filled treat bag with some new 1/4" Copper Trim.  To put the crate together I used Fast Fuse to give it a stronger hold.  

These crates are the perfect size to put small note cards inside.  Wrap a few together and this would make a nice teacher gift!


The following were used:

Monday, April 24, 2017

Cutie Pie Thinlits


The Cutie Pie Thinlits which are retiring, are my go to product when I want to make cute boxes for gifts.  When cut they look like cake slices, but you can also decorate them as Christmas trees or get really creative and you can turn them into cute animals.

I cut these boxes to use for Mother's Day gifts and they are big enough to fill with lots of chocolates, or even some nice jewelry or whatever type of small gift you want to give.  Decorate them to go with the occasion you are giving them for and in no time you have a really cute gift box.


I decorated the top of my boxes by punching flowers with my Pansy punch and an assortment of Designer Series Paper.  One of the flowers on each box was punched with Whisper White Card Stock and my Mother's Day sentiment was stamped on this flower.  I tied a bow around each box for a bit more embellishment.


The boxes are easy to cut and you can get one full cake slice using one 8 1/2 x 11 sheet of card stock with some left over paper for scraps.  You can use your Tear Tape or Fast Fuse to adhere the box together, and when you untie the ribbon the box opens up on the back and stays intact to be used again.


The following were used:

Monday, September 26, 2016

Another quick Halloween Treat Box


Back of the box - you can easily see the products inside.

Stampin' Up! has a lot of nice packaging options for small gifts and treats.  One of my favorites is the Cleary Tiny Treat Boxes.  They are really easy to assemble, and since they are clear there is no guessing what is inside.  That is a real big plus for me when I make items to sell at craft fairs.  People can see exactly what they are purchasing.  I create little sleeves to go around the box so you can just slip that off, take out your treat, and you can save the box to reuse again.

The sleeve I make around the box measures 2" x 8 3/4".  I score it at 2", 4", 6", and 8".  I wrap this around my box, making sure to leave the opening in the front and not covered up.  I use Fast Fuse Adhesive to keep the sleeve together, add a bow and my tag and the filled box is ready.

I used retired Halloween Paper to make my sleeve, but decorated the front of the box with my little Cookie Cutter Critters. 


The following were used:

Friday, October 9, 2015

Festive Flower Builder Punch

The Festive Flower Builder Punch can be used for so many cute projects.  I posted a card a few weeks ago and today I am adding two gift ideas for this punch.    And, don't think that once the holidays are over you need to put it away, just change the color and pattern of your paper and you can make pretty flowers for any occasion.

To make your flower you will need to punch your card stock four times.  If you want it any larger, just punch a few more times until you get the size you want.  The top flower on my gift bag has four extra petals, the other flowers were made with punching my card stock four times.
Gift bag ready to fill!

Fry Box filled with Hershey Kisses
The flower on the gift bag was embellished with Gold Glitz Dazzling Details to go with my new Gold Glitter Ribbon.  The flower on the Fry Box was embellished with Dazzling Details, and my bag of Hershey Kisses was tied with Garden Green 1/8" Striped Ribbon.  Both flowers have a  White Perfect Accent in the middle.

To put the flower together I used a hot glue gun and the Silicone Craft Sheet.  With this sheet, you can put your hot glue right on the sheet, and then start building your flower as you add more glue.  When you are finished, your flower lifts right up.  This sheet works great with any adhesive, but is a must have when using a glue gun.


The following were used:
Built for Free Using: My Stampin Blog