Showing posts with label Gift Card Holders. Show all posts

Monday, June 26, 2017

"Pocket Money"


Now who wouldn't like a card that has some money or a gift card included.  The cut pocket is large enough for some rolled up money and would also be large enough for a gift card.  

To make the pocket I cut the framelit out with my Big Shot, folded it on the score lines, stamped my stitching directly onto my paper and used mini dimensionals to adhere it to the card.  I also added some Garden Green Washi Tape from the Basics Pack 2, stamped my sentiment and punched that out with 1 1/2" Circle Punch.  

You could also turn this pocket into a single gift card or money  holder if you didn't want to attach it to a card.  Just cut out two pockets and adhere them together.  I will be using this a lot during the holidays when I am busy making products for craft fairs.  

The following were used:

Monday, October 6, 2014

Gift Card Holders

Need a quick and easy way to make some gift card holders, try using the precut, and prescored gift cad enclosures made from Kraft Card Stock by Stampin' Up!  You can run them through your Big Shot and emboss them with your embossing folders, add a belly band made up of ribbon, designer series paper or card stock, and decorate and embellish a variety of ways.  I made the following for the Christmas holidays, but you could use them for any occasion. 
The two above were embossed with the Stylish Stripes and Northern Flurry Embossing Folders and decorated using Nordic Noel DSP, and Real Red 1/4" Cotton Ribbon.  Current Stamp Sets used were Wondrous Wreath and the coordinating Framelits, and Festival of Trees for my Merry Little Wish sentiment.

 
Current products in the two above are the Joy from the Wonderful Wreath Framelits Dies, and the stars were cut out using the Star Framelits. 

 
The Festival of Trees Stamp Set and Coordinating Punch, White Christmas and Endless Wishes Stamp Sets were used for my last two gift card holders, along with some 1 1/4" Burlap Ribbon and Cherry Cobbler 1" Sheer Linen Ribbon.  The bow was made using the Gift Bow Bigz L Die and made with retired Designer Series Paper. 
 
For my Belly Bands the ribbon length I used was 10" and for my Designer Series Paper belly bands my measurements were 10" x 1 1/2".  I put them on firmly enough so they wouldn't come off, but not too tight that they couldn't easily be removed so I could sell them at craft fairs and show them finished without the actual gift card being inside.   


Along with the products mentioned above here is a better look at an unfinished Gift Card Enclosure.  You get 10 per pack and are a nice value at $5.95 per pack.

Wednesday, December 11, 2013

Top Note Gift Card Holder


First picture, front of Gift Card and below - back of card with opened slot for placement of card.


To make the gift card I cut a piece of Cherry Cobbler Card Stock with my Big Shot and the Top Note Bigz Die.     I then cut another Top Note Die with a piece of Season of Style Designer Series Paper.  Since you only need half of the cut Die you can save the other half for another gift card.  To adhere this to the Cherry Cobbler Top Note, I placed Sticky Strip around the two sides and the bottom.  Make sure you put no adhesive on the top, because this is the slot to place your gift card.

I decorated the front using two stamp sets -  Festive Flurry from the Holiday Catalog, and Sassy Salutations from the Annual Catalog.  I stamped my images using White Craft Ink.  I let it dry for a few minutes and then placed my Cherry Cobbler Baker's Twine onto the top using a Brights Glimmer Brad to keep it in place.

I have seen a lot of this type of Gift Card made, and this is not my original idea but I was inspired by all those I have seen.

The following were used:
Card Stock:  Cherry Cobbler #119685
Designer Series Paper: Season of Style #132340
Ink:  Whisper White Craft #101731
Stamp Sets:  Festive Flurry #131778 w or #131781 c, Sassy Salutations #132070 w or #126707 c
Ribbon:  Cherry Cobbler Baker's Twine #123125
Tools:  Big Shot #113439, Top Note Bigz Die #113463
Embellishment:  Bright 3/8" Glimmer Brads #121006
Adhesive:  Sticky Strip #104294


Wednesday, November 6, 2013

Christmas Gift Card Wallets

Closed Wallets


Opened Wallet - place to put a gift card on the left.


I made gift card wallets last year, but changed the dimensions just a bit this year.  My card stock measures 10" x 4 1/4", just a bit smaller than the ones I made before.  They fit in the envelopes better since they tend to be bulky.

I scored my card stock at 5" and folded it in half.  The strip of Designer Series Paper on the front measures 4 3/4" x 1 1/2" and I rounded the corners.  The card stock used to hold my gift card measures 2 1/2" x 4 7/8" and I used Sticky Strip around the edges to hold this down.  I thought it might need some extra hold since a gift card would be going inside.    To decorate the front I embossed some of them using the Square Lattice Embossing Folder , and some I pierced around the edges with my Paper-Piercing Tool.

The tab to hold it closed measures 2" x 3/4" and I attached the back with a small piece of Sticky Strip and used Velcro to hold the wallet closed in the front.  You can decorate them all different ways and just change the sentiment and paper for another occasion.

The following were used:
Card Stock:  Cherry Cobbler #119685, Whisper White #100730, Island Indigo #122923
Designer Series Paper:  Season of Style #132340, Winter Frost #132341
Ink:  Cherry Cobbler #126966, Island Indigo #126986
Stamp Sets:  Very Merry Tags #130393 w or #130402 c, More Merry Messages #126400 w or #126402 c (Holiday Carry Over Stamp Set)
Tools:  Big Shot #113439, Square Lattice Embossing Folder #119976, Paper-Piercing Tool #126189, Stampin' Pierce Mat #126199, Essentials Paper-Piercing Pack #126187
Punch:  Modern Label #119849


Wednesday, September 26, 2012

Wallet Gift Cards


There always seems to be someone on my Christmas list that gets Gift Cards so I am always looking for another way to package them.   I have seen wallets made into cards before, and I thought it would be fun to make some into gift card holders.  Using the already designed squares in one of the papers from the Snow Festival Designer Series Paper, it was really easy to decorate the front and dress them up a bit. 
 
To start I cut my cardstock to measure 4 1/4" x 11" and folded it in half.  I rounded the edges and embossed the folded wallets using a variety of embossing folders.  Next, I added some WhisperWhite cardstock to the inside on the right to leave a space to write a message.  To make a spot for my gift card, I cut a coordinating piece of cardstock to measure 5 1/4" x 2" and placed Sticky Strip on the bottom and two edges.  To keep it closed, I cut a small strip of cardstock, placed a small piece of Sticky Strip on the piece I placed in the back, and velcro on the front pieces.  Now the gift cards are easy to open and close. 
 
Just decorate the front as you wish, add your sentiment, and you are done.  The inside pocket is big enough that you should have no trouble placing any size gift card inside.
 
The following were used:
Cardstock:  Cherry Cobbler #119685, Baja Breeze #111352, Early Espresso #119686, Gumball Green #126840, Whisper White #100730
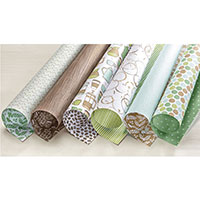
Designer Series Paper:  Snow Festival #126908 (Holiday Mini)
Ink:  Gumball Green #126861
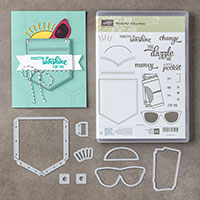
Stamp Set:  More Merry Messages #126400 wood or #126402 clear
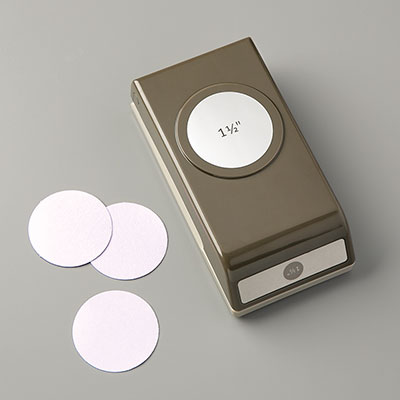
Punches:  1" Circle #119868, 3/16" Corner #119871, Itty Bitty Shapes Punch Pack #118309
Adhesive:  Sticky Strip #104294, Dimensionals #104430, Snail #104332
Tools:  Big Shot #113439,  Petals-a-Plenty Embossing Folder #116824

Friday, December 17, 2010

Peaceful Season

I love how Stampin' Up's! stamp sets have everything you need.  Along with the Peace on Earth sentiment written in beautiful script, how clever was it to have another stamp in the set with a picture of the earth made to look like a tree ornament.  These are just two of the 6 stamps in the Peaceful Season set that are a Level 2 Hostess set that lucky hostesses could earn free with a qualifying workshop held during the holiday mini period which ends January 3, 2011.  If this is a set you wish you could of received but didn't have time to book your workshop, don't worry, there are still beautiful hostess sets available in the Idea Book and Catalog and still more in the upcoming mini coming out in January 2011.   However, if this is a set you would like to earn you can always place your own qualifying order through my on-line store and receive hostess benefits even though I will not be holding anymore home workshops from now until the beginning of the new year.  E-mail me if you have any questions on how you can make this happen.

For today's card I started with Always Artichoke cardstock for my base and added a layer of Cherry Cobbler and a stamped and embossed layer of Very Vanilla.  If you are going to emboss a layer that you are also stamping on, make sure to stamp your images first.  Once the layer is embossed your stamped images may not cover some of the embossed designs.

For today's card I used the following:
Cardstock:  Always Artichoke #105119, Cherry Cobbler #119685, Very Vanilla #101650
Ink:  Always Artichoke #105219, Cherry Cobbler #119669
Stamp Set:  Peaceful Season #120819 wood mount, or #121124 clear mount (Level 2 Hostess Set - Holiday Mini Catalog)
Accessories:  Big Shot Die Cutting Machine #113439, Petals-a-Plenty Embossing Folder #116824
Punch:  Ticket Corner #119867

Thursday, November 11, 2010

Top Note Die Gift Card Holder


Thank you Leena Girsa for your inspiration for today's gift card design.  I was looking for quick, yet cute gift gift card holders for Christmas, something that makes giving it a little extra special, and I saw one posted on Leena Girsa's blog.  I am so appreciative for all of the inspiration I receive from so many talented demonstrators. 

To make the gift card holder I cut two pieces of Deck the Halls Designer Series Paper with the Top Note Die and my Big Shot Machine.   I used a 5/8" neutral brad to act as the hinge so it was easy to open.  On the inside I cut another Top Note Die with Always Artichoke cardstock and cute it in half.  I placed this over the bottom of the inside die to create my pocket to hold the gift card.  A little big of snail adesive was run along the otside of this cut Top Note to hold it in place, making sure not to put any adhesive on the top or middle.
A little sentimnent on the inside and  tag and ribbon on the front for extra embellishment, and all done.  Now if I just had the Christmas shopping done too I would be in great shape.

To make today's Gift Card Holder I used the following:
Cardstock:  Always Artichoke #105119, Very Vanilla #10150
Designer Series Paper:  Deck the Halls #120810 (Holiday Mini)
Ink:  Always Artichoke #105219
Stamp Set:  Tags til Christmas #120847 wood mount, or #121169 clear mount (Holiday Mini), Christmas Greetings #115448
Punch:  Decorative Label #120907 (Holiday Mini)
Ribbon:  Cherry Cobbler Seam Binding #120992 (Holiday Mini)
Accessories:  5/8" Neutral Brad #11533, Big Shot Machine #113439, Top Note Bigz Die #113463