Friday, February 27, 2015

Framelit Storage Idea


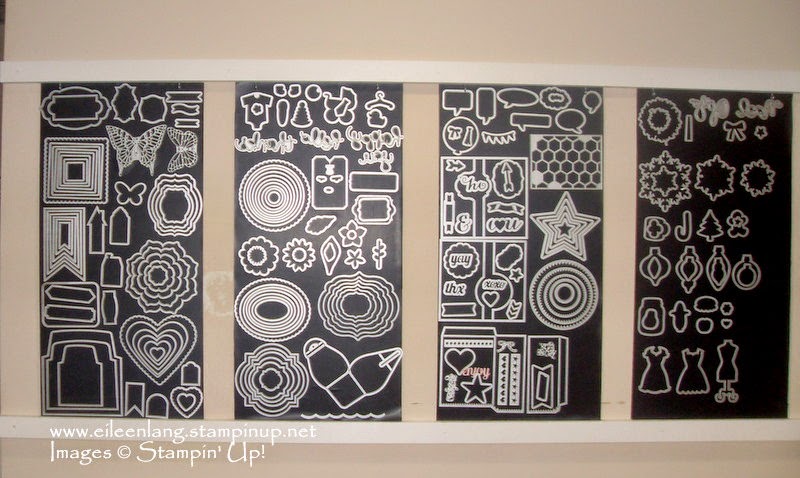
I finally got around to having my Framelit Storage wall finished, thanks to my husband.  I actually saw this at the home of one of my customers and couldn't wait to have it done for my stamp space.  The magnetic rolls that you can purchase at any craft store come 12" x 24" so my husband went to Home Depot and had four pieces of wood cut at that size.  The magnetic sheets have an adhesive backing so I just peeled that off and placed them on top of the cut wood.  My husband then added the top and bottom ledge for more stability, and he placed small hooks at the top to keep them in place.  They slide in and out easily and are not nailed to the wall, just kept I place with the small hooks.
 
If you didn't want to add the top and bottom shelf you could just drill two small holes in the top of the board and hang them up that way. 
 
 
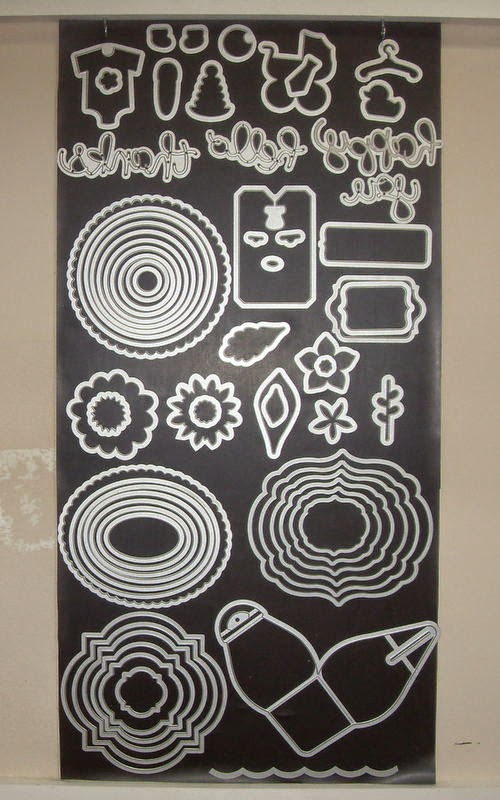
Here is another look.  If you look closely at the top you can see the two small hooks that are holding them in place. 
 
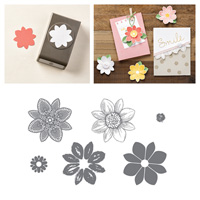
I have the Framelits on the wall right above the table where my Big Shot Die Cutting Machine is.  This way when doing a workshop or a class everything is readily accessible.  The framelits that we are using for that particular class or workshop are kept on the table in a clear case, but if the ladies want to use something different they can now easily see everything that I have for them to use.


Wednesday, February 25, 2015

Petal Potpourri Thank You


I layered pieces of  Something Borrowed Designer Series Paper onto my card, added a stamped and punched Petal Potpourri, a simple pearl and my Thank You card is complete.  If my paper has pretty designs I don't always like to add a lot of extra stamping. 
 
The Petal Potpourri Stamp Set and coordinating Flower Medallion Punch when purchased together save you 15%. 
 

Monday, February 23, 2015

Curvy Keepsake Box - Bunny and Chick Boxes


I love when a product can be used to make so many creative things.  Now that it is almost Easter, not only do I make things for my own grandchildren, but I also do craft fairs and try to have new products each year.  The Curvy Keepsake Box is just the ticket when you need something for little treats.  It is one of the items carried over from the Holiday Catalog, and you can get really creative with punches to create so many different things.  Hershey Chocolate Eggs fit perfectly inside.

Several other Stampin' Up! demonstrators have shared their creativity with this die and I want to thank them for sharing and giving me great ideas, especially Nancy Dawson who created a similar bunny box and Sam Charlton for the chick box idea.

A list of the punches I used is below but feel free to leave a comment if you need any other instructions. 

Saturday, February 21, 2015

February Paper Pumpkin

Below is a video on the newest Paper Pumpkin.  I love getting these surprise kits in the mail each month.  Each month something new to create with all of the necessary supplies.  New ink spots and stamp sets to keep when you are finished with the month's kit to use over and over again.  It doesn't get any easier than that.
 
If you are interested in trying Paper Pumpkin there are several ways to subscribe.  And during Sale-a-bration the 3 month Prepaid Subscription is on sale and you would also qualify for 1 Free Sale-a-bration product. If you choose to do a 6 month prepaid subscription you save $1.00 per month and would qualify for 2 Free Sale-a-bration products.  A 12 month prepaid subscription would save you $2.00 per month, qualify you for 4 Free Sale-a-bration products and earn you $30.00 in hostess credits that could be used for anything in the Annual or All Occasions Catalogs.  Wow - a lot to consider, but I think the kits keep getting better each month.  If you think you would like to try it just click the link in the left hand column of my blog.  I will be happy to also help you come up with alternate ideas for the kits because once you use up all of the die cuts and accessories included you will still have your stamps and ink to use for future projects. 
 
Item
Paper Pumpkin Prepaid Subscription
Price (Shipping Included)
137858
 1 month
$19.95
137859
 3 months
$59.85 $54.85
137860
 6 months
$113.70 -- save $1 per month
137861
 12 months
$215.40 -- save $2 per month

Friday, February 20, 2015

Chalkboard Thank You


Yes, the Chalkboard Paper is different from the Basic Black Card Stock.  The paper has a smooth grain, it is heavier than Card Stock, and the paper works really well with the Chalk Inks.  For my Thank You Card I used the Rose Coral and Yellow Citrus Chalk Inks.
 
My stamped flowers are from the Beautiful Bunch Stamp Set, and the thank you is from Painted Petals.  I used my Heat Tool to set the ink quicker.  You don't need to do this, but it just let me put it together quicker.  I also tied some Pink Pirouette 1/2" Seam Binding around my layers for a finishing touch.


The following products were used:

Wednesday, February 18, 2015

Painted Petals


I'm certainly ready to see some flowers blooming soon, but with all the snow on the ground, the only place I can see them is in my cards.  It feels good though to start preparing cards for spring and summer occasions, and the Painted Petals Stamp Set is just perfect to get me in the mood for Spring.
 
You can add a watercolor look to your card if you spritz your stamp before you actually stamp it onto your card stock, but I just went from ink pad to card stock for my card.  I didn't press really hard onto my ink pad so I still got a little bit of shading in the colors.    I stamped my flower petals first, then I stamped the stems, but I really don't think it matters because flowers don't need to look uniform.
 
I also added some pearls to the center of my flowers and some Night of Navy Seam Binding under my sentiment to finish my card.