Tuesday, October 31, 2017

Stampin' Blends will be here tomorrow!


I just wanted to post another card made using my new Stampin' Blends.  How cute are those two little birds, and I really like the large thank you sentiment too.  Both the blends and the stamps you see used in this card will be available for purchase starting November 1st.  The blends come in a variety of colors, and there is also a really cute card kit that you can purchase as well. 

I'll post more information tomorrow when all of these products go live. 

Monday, October 30, 2017

Just Add Color!

With the new Stampin' Blends, which will be available on November 1st, you can just add color!  I took a small piece of Just Add Color Specialty Designer Series Paper and using my Stampin' Blends I was able to get all of this color.  I love how easy they are to use and love the contrast they add to your project.


The Designer Series Paper can be yours for free too.  Don't forget that the Buy 3 get 1 FREE paper promotion ends October 31st and if you want this pretty paper, which is great for coloring, why not get a few packs of your other favorite Designer Series Papers and select this one as your free choice.  

Here are the current products I used:

Friday, October 27, 2017

Stampin' Blends coming November 1st!

Stampin' Blends, a fun way to add color and shading to your projects will be available to purchase November 1st.  Demonstrators were able to preorder their blends a few weeks ago, and I must say I really love them.  Below is a video  by Stampin' Up! that tells you more and shows you how to use them.


You can click here to see the brochure which shows all of the colors and the cute kit that you can purchase as well.  


Stampin' Blends Features

  • Add just the right amount of color where you need it with the brush tip or fine-point.
  • Each color (except Ivory and Bronze) has a light and dark shade marker, available individually or in a combo pack.
  • Stampin' Up! has done in-house testing for evaporation and life testing and they are really happy with the results.
  • Press fit seal prevents air from entering the barrel and causing evaporation.
  • The nestable lids are easy to keep track of and have a tight fit for long-lasting color.
If you have any questions about the blends, comment below or send me an e-mail.  I will be posting a project on Monday showing one of my cards made with the Stampin' Blends, and can't wait to share them with my customers at my November stamp class.  

Wednesday, October 25, 2017

One more week - Designer Series Paper Sale


The sale period ends October 31st, 2017, and there is no limit to how many times you can buy three packages of Designer Series Paper and get one free. You choose which three packages of Designer Series Paper you will order from the sale items and which package to receive for free.  Tip -  If you are ordering any paper in the $10.00 range, you can select a paper that costs $13 or $11 for your free paper.  It will automatically give you the 4th paper you order as your free choice.

Note:
  • Designer Series Paper purchased as part of a Starter Kit does not qualify for this sale.
  • Designer Series Paper ordered with Stampin’ Rewards does not qualify for this sale.
The papers that qualifies for the sale are listed below:


Designer Series Paper Sale Items


CatalogItemDescriptionPrice
Annual (p. 189)144180Just Add Color Specialty Designer Series Paper$13.00
Annual (p. 189)144137Delightful Daisy Designer Series Paper$11.00
Annual (p. 189)144118Birthday Memories Designer Series Paper$11.00
Annual (p. 188)144111Be Merry Designer Series Paper$11.00
Annual (p. 188)144163Pick a Pattern Designer Series Paper$11.00
Annual (p. 188)144155Coffee Break Designer Series Paper$11.00
Annual (p. 188)144185Naturally Eclectic Designer Series Paper$11.00 
Annual (p. 188)144110Whole Lot of Lovely Designer Series Paper$11.00
Annual (p. 187)144168Petal Garden Designer Series Paper Stack$10.00 
Annual (p. 187)144193Color Theory Designer Series Paper Stack$10.00
Annual (p. 187)144177Wood Textures Designer Series Paper Stack$10.00
Holiday (p. 29)144629Christmas Around the World Designer Series Paper$11.00
Holiday (p. 49)144613
Painted Autumn Designer Series Paper
$11.00


If you are a customer of mine and would like to only order 1 or 2 packs of the paper, e-mail or call me with your item numbers and when I get other paper orders I will place them all together and give you the discounted price when everything is finished and I have calculated the savings.  .  I will be placing these orders on October 30th to give every one time to contact me with your selections.  Any questions leave a comment below or call or e-mail.  Thank you!


Monday, October 23, 2017

Spooky Night


If you want a quick and easy Halloween card, use some Spooky Night Designer Series Paper and pair it up with some stamps in the Spooky Cat Stamp Set.  Add your layers, stamp and punch out your sentiment and then add some Black Rhinestone Jewels for extra embellishment.

It doesn't get much easier than that.  With coordinating paper, stamps, punches, die cuts, and embellishments Stampin' Up! products are always great for all of your cards and projects. 


The following were used:

Thursday, October 19, 2017


The October Paper Pumpkin kit will arrive on your doorstep in plenty of time for assembling and holiday giving.  You might have already received it but if you haven't here is a sneak peek of the beautiful shaker cards that are inside.  The cards are a snap to put together. and are so pretty and full of the Christmas spirit with  rustic pine trees, shimmering “snowflakes,” and merry greetings.

The November kit will coordinate in some way with this kit, so if you haven't signed up to start receiving Paper Pumpkin and don't want to miss out on the next kit, you can click here to sign up.

Try it, and if for any reason you are not happy with it you can cancel your subscription at any time.  When you are a subscriber you can also order additional kits while they are available, and stock up on some of your favorites.  

Tuesday, October 17, 2017

Count my Blessings

The Count my Blessings Stamp Set is really nice for fall cards.   Pair the stamp set up with some Painted Autumn Designer Series Paper and you have the perfect combination of color and stamped images.

My card base is Very Vanilla Card Stock that was layered with Cajun Craze Card Stock and Painted Autumn DSP.  I also added another smaller layer of the Cajun Craze Card Stock under the piece of Very Vanilla that was stamped with my images.  I used Smoky Slate ink  for the flower and leaves, and then filled them in with Cajun Craze and Lemon Lime Twist ink,  using my Blender Pens.  

The sentiment was stamped onto another piece of Very Vanilla Card Stock, snipped at the one end, and embellished with a piece of Smoky Slate Gingham Ribbon.

The following were used:

Friday, October 13, 2017

Celebration Time!

Today's card features the birthday cake from the Celebration Thinlits Dies and coordinating Celebration Time Stamp Set.  Both of these products can be purchased together in a bundle to save you 10%.


My card base of Pool Party Card Stock was layered with a piece of Whole Lot of Lovely Designer Series Paper.  Using coordinating colors in the paper, I layered a piece of Tangerine Tango Card Stock under my cake that was stamped with Tangerine Tango Ink onto a piece of Whisper White Card Stock.  To add some texture to my small layer I embossed it with the Ruffled Embossing Folder.  I also added a small strip of Pool Party 3/8" Shimmer Ribbon to the layer, and placed my cake on with Dimensionals to finish the card.

The following products were used:

Wednesday, October 11, 2017

Mini Coffee Cup Treat Holders

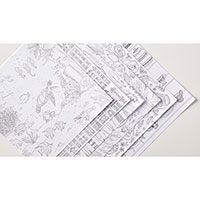
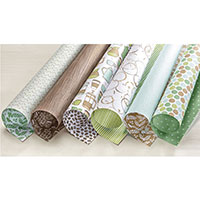
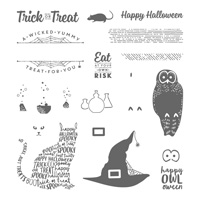
Another fun craft to make for gifts are the decorated mini coffee cups.  I got the cups at a local restaurant store and wrapped them with retired designer series paper.  You could make them for any occasion but since mine were for upcoming holiday craft fairs I used a holiday design.

To make it easier and a little nicer to package I found a template on how to make a holder.  Thanks to Stampin' Up! demonstrator Anne Burnham for the directions on how to make the holder.  Directions are below.

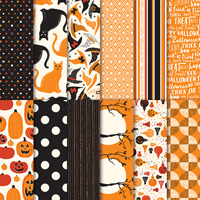
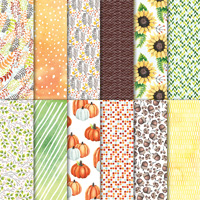
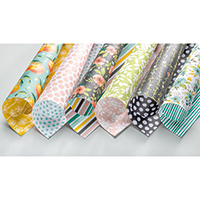
I filled each mini cup with a K Cup and I will be able to tell what flavor of K Cup is in each one by using the same pattern of Designer Series Paper for each flavor.  I like to do a variety of flavors, and this is an easy way to help me know what is inside each one.    You could also use candy, but since I am filling a coffee cup I thought adding some real coffee would be nice.  I have also seen this design where you could add a coffee gift card to the holder as well, and I will do that for personal gifts that I will be giving out.


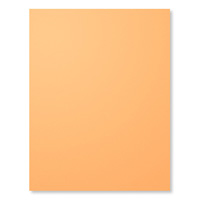
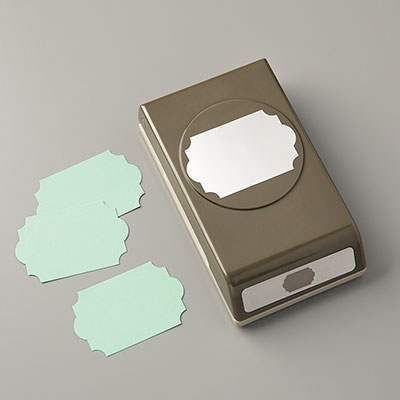
To make the holder start with a piece of card stock that measures 2 1/2" x 11" and score on the long side at 1/2", 3", 3 1/2", and 6".  Fold on the score lines as shown in the second picture below, punch a 2" circle for the coffee cup to fit, and  bring the bottom piece up and attach it to the back of the base. I used Fast Fuse adhesive to adhere it.  I also used my retired corner rounder punch to round the top corners and put on some matching Washi Tape to dress it up a little more.


Finished Product!

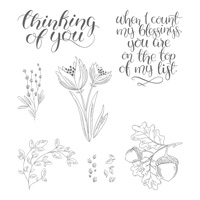
I added some mints, put everything into a clear cello bag, and tied on my sentiment.  

Monday, October 9, 2017

Window Box Night Light or Luminaria

The Window Box Thinlits create a really nice box to put in a battery operated tea light that turns it into a night light or holiday luminaria.    The thinlits come with three different cut outs for the windows on the sides, and I choose the small dots for my Merry & Bright Luminaria.  I cut it out using retired designer series paper, but liked the thickness of the old kraft paper so if you want to use current product the thick Whisper White and Very Vanilla would work nicely, and you could add Designer Series Paper or stamp on it before you cut it out.

I used Fast Fuse Adhesive to put the box together, and the trick to making it easier is to cut off the two side tabs on the bottom layer before putting it together.  I do not adhere the top lid down because I want to be able to take the candle out when the battery dies and be able to replace it without tearing the box.

I finished the top by adding some wooden snowflakes that were left over from a past Paper Pumpkin kit, added my tag, tied the bag with retired Gold Satin Ribbon.  I think these will be a nice addition to the other holiday items I have made for my Craft Fairs, and I plan on keeping one for myself to put in my powder room as a nice night light.

Note -  In the other boxes  that I made, to decorate the top I cut out snowflakes using Gold Glimmer Paper and the three  snowflakes in the Seasonal Layers Thinlits.  They added a nice shimmery addition to the top of the box as well.


 I couldn't get a good picture of what it looks like when it is dark, but the light shines nicely through the small holes.

The following current products were used: