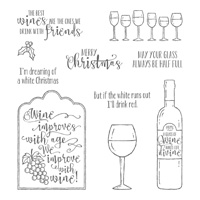
With all of the holiday parties coming up, I thought it would be nice to create some wine bottle gift tags for personal use and for my craft fairs. And, the new Half Full Stamp Set has just the perfect stamps and sentiments for these tags.
Even if you are not expected to bring anything to the party, it is still nice to take the host a nice bottle of wine. These easy to make tags can dress up a bottle and make the gift feel a bit more special.


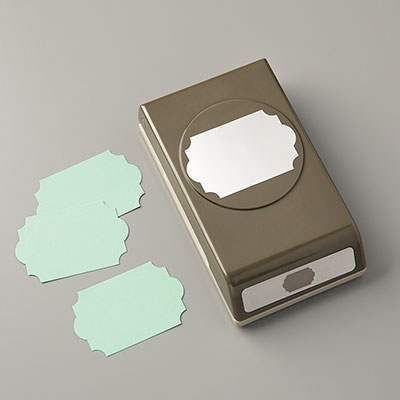
To make the tags I cut my cardstock to measure 3 1/2" x 9 1/2" and scored it at 2 1/2". I rounded the corners using the retired 3/16" Corner Punch and dressed them up using a variety of ribbon, Designer Series, Paper and sentiments. To make the opening for the bottle I punched a hole in the top with the 1 3/8" Circle Punch. To decorate the circle and make it sturdier, I punched another 1 3/8" circle into coordinating cardstock, and then lined up my 1 3/4" Circle Punch over the cut out circle and punched it out.
To dress them up even a bit more you could tie more ribbon around the neck of the bottle, but for now I think I will leave mine the way they are.
I used retired Designer Series Paper for my tags, but listed below are the current products used: