Monday, March 14, 2016

Grateful Bunch Screen Card

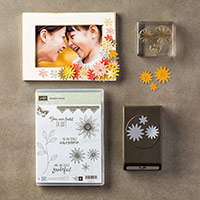
I decided to make another screen card showcasing the Grateful Bunch Stamp Set and coordinating Blossom Bunch Punch (more products that can be purchased together as a bundle to save you 15%).  If you read my post from Friday, you can get all of the dimensions for making your own screen card.  


You can read all of the products used below.  


Friday, March 11, 2016

Birthday Screen Card


Screen cards are really easy to make and they allow you four panels of creativity  to spread your cheer.  I always make sure to leave enough space on the last panel to write my message, and with so many new stamps sets in the Occasions Catalog I knew I wanted to do another one at this month's stamp class.  

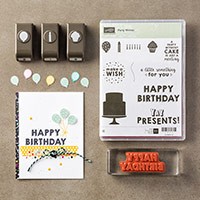
Using products from the Party Wishes Stamp Set and Party Punch Pack which purchased together in a bundle save you 15% I came up with this fun birthday card.  Directions for making your own screen card are below. 

1.  Start with a piece of Card Stock measuring 5 1/2" x 11"
2.  On the long side score your Card Stock at 2 3/4", 5 1/2", 8 1/4"
3.  Fold your Card Stock on the score lines to create your panel.
4.  For the legs - take your Decorative Label Punch and center in between each panel and punch.
5. Decorate your panels using the dimensions:  2 1/2" x 4 1/4" for your bottom layer,  and 2 1/4" x 4" for the top layer (the layer I stamped on).

If you have any questions about making your own screen card send me an e-mail or leave a comment below.  


Thursday, March 10, 2016

Botanical Blooms


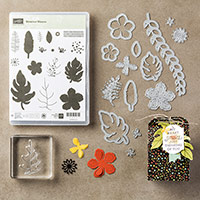
Such a great bundle!  The Botanical Blooms Stamp Set, Botanical Builder Framelits and Botanical Gardens Designer Series Paper, all purchased together saves you 15% and best of all the products are so much fun and really let you get creative.
I know I already posted another card using these products, but there are so many possibilities for card ideas that I wanted to make another one for this month's stamp class.  Listed below are the products used.

Monday, March 7, 2016

Blessed by God


I have heard from a few of my customers that there were not a lot of stamp sets for Easter in the Occasions Catalog.  While I have to agree with them on that, there are still a lot of stamp sets in the Annual Catalog that you can use for your Easter Cards.  I saw a similar card posted by another Stampin' Up! Demonstrator, but unfortunately it was awhile ago and don't remember her name, but she was the inspiration for this card.  


My card base is Very Vanilla Card Stock that was stamped the sun, butterfly, leaves and dots all from the Kinda Eclectic Stamp Set.  The cross was taken from the Blessed by God Stamp Set and fit nicely over my sunshine.  I think this makes a really pretty and appropriate Easter Card using sets from the Annual Catalog.


The following were used:

Friday, March 4, 2016

Baker's Box Thinlits - Bird House

When I participate in craft fairs for the holidays I try to come up with a few different product ideas to go along with the usual bunnies and chicks.  So this year I thought I would turn the Baker's Box Thinlits Die into a bird house.  I cut a hole in the center using a Circle Framelit, not the framelit that came with the box (I wanted a smaller circle), adhered a Window Sheet on the inside and added my Robin Eggs.  I placed a Hello Spring tag on one side, and a Happy Easter tag on the other side.  Now, when you think of Spring you can also think of Easter and all of the goodies that the Easter Bunny brings.

You can cut this framelit with Designer Series Paper or Card Stock.  I used paper from the Neutral Designer Series Paper Stack.  You can cut two bird houses with one 12 x 12 sheet of paper.  There are instructions that come with the thinlit on how to put the box together.  I added the mini clothespin at the top more for decoration than to keep the box together since I used my Tear & Tape Adhesive to keep it together.


Front view of the Bird House

Side view

side view

The following were used: