Friday, October 12, 2012

Happy Halloween!


I really like the bold patterns in the Howlstooth & Scaringbone Designer Series Paper, in the Holiday Catalog.  This is one of the cards I had at last month's stamp class, and one of the ladies didn't need any Halloween cards, so she just used the same layout and papers, changed her images, and she had a nice fall card.  For a Halloween card, I really liked the cute witch.  She is not too scary, and perfect for my 2 1/2 year old granddaughter. 
 
After I stamped my witch onto Very Vanilla cardstock using Basic Black ink, I colored in her hat and buttons using my Tangerine Tango marker to give her a bit more color.  Another new item used on this card is the 1 1/4" Scallop Circle punch.  It is the perfect size for my sentiment, and by placing it on with dimensionals, my ribbon bow was able to set nicely behind it.
 
The following were used:
Cardstock:  Very Vanilla #101650, Basic Gray #121044, Basic Black #121045
Designer Series Paper:  Howlstooth & Scaringbone #126906 (Holiday Catalog)
Stamp Sets:  Googly Ghouls #128060 wood or #128063 clear (Holiday Catalog), Wicked Cool #118738 wood or #120600 clear
Punches:  1 1/4" Scallop Circle #127811 (Holiday Catalog), 2 3/8" Scallop Circle #118874, 2 1/2" Circle #120906
Ribbon:  Very Vanilla 1/2" Seam Binding #120999
Adhesive:  Dimensionals #104430, Snail #104332
 

Wednesday, October 10, 2012

Tile Coasters

Looking for another way to hand make a Christmas gift? Just purchase some plain tiles at a local hardware store, and use Staz-On ink and your favorite stamp sets to dress them. Here are just a few of the ones I have made. In two days I was able to make 80 coasters, that is the amount of tile that comes in one box. 40 of them were made with stamped images, and another 40 were made using Designer Series Paper. I packaged them in groups of four. I will show some of the ones made with Designer Series Paper tomorrow
Made four of each ot these two designs

Made four of each of these two designs
 
By
These four went as a set.

These four went as a set


Tied with ribbon to keep them secure and easy way to package.
 
 
To make the tile coasters, I first cleaned each tile off to make sure there were no oils or dirt on them.  I then took my stamps and using StazOn Ink, I stamped on my images and left them dry overnight.  I then sealed them by using a clear acrylic sealer that I purchased at a local craft store.  I sprayed on two light coats, waiting about an hour in between each one.  After the sealer was dry, I turned them over and put little felt pads in the corners.  I then tied them up in pretty ribbon.  So simple, but yet a really nice gift not just for Christmas, but for any occasion. 
 
The following Stampin' Up! products were used: (current products listed only)
Ink:  Black StazOn #101406
Stamp Sets:  Serene Silhouettes #127322 wood or #127324, Evergreen #127970 or #127973 clear (Holiday Mini), Day of Gratitude #120835 wood or #121148 clear,  By the Seashore #126530 wood or #126532 clear, Elements of Style #118611 wood or #120045 clear, Happy Hour #126640 wood or #126642 clear, More Merry Messages #126400 wood or #126402 clear

Tuesday, October 9, 2012

Wine Bottle Gift Tags


A nice gift tag to go with a bottle of wine or other liquor.


With all of the holiday parties coming up, I thought it would be nice to create some wine bottle gift tags.  Even if you are not expected to bring anything to the party, I still like to take the host a nice bottle of wine.  These easy to make tags can dress up a  bottle and make the gift feel a bit more special.
 
To make the tags I cut my cardstock to measure 3 1/2" x 9 1/2" and scored it at 2 1/2".  I rounded the corners using the 3/16" Corner Punch and dressed them up using a variety of ribbon, Designer Series, Paper and sentiments.  To make the opening for the bottle I punched a hole in the top with the 1 3/8" Circle Punch.  To decorate the circle and make it sturdier, I punched another 1 3/8" circle into coordinating cardstock, and then lined up my 1 3/4" Scallop Circle Punch over the cut out circle and punched out the scallop circle.  I find that is easier to do than trying to line up my circle punch over my cut scallop circle.  This way I can see exactly where my scallops are lining up. 
 
To dress them up even a bit more you could tie more ribbon around the neck of the bottle, but for now I think I will leave mine like this.
 
The following were used: (Only current products listed)
Cardstock:  Real Red #102482, Cherry Cobbler #119685, Gumball Green #126840, Baja Breeze #111352
Designer Series Paper:  Be of Good Cheer #126896, Snow Festival #126908 (Holiday Mini)
Stamp Sets:  More Merry Messages #126400 wood or #126402 clear, Tags til Christmas #120847 wood or #121169 clear, Happy Hour #126640 wood or #126642 clear
Ribbon:  Real Red 1/4" Stitched  Grosgrain #126875
Punches:  3/16" Corner #119871, 1 3/8" Circle #119860, 1 3/4" Scallop Circle #119854, Decorative Label #120907, 1 1/4" Square #119865, 1 3/8" Square #119877
Ink:  Real Red #126949, Cherry Cobbler #126966, Baja Breeze #126960
Tools:  Big Shot #113439, Apothecary Accents Framelits #127003
 

Monday, October 8, 2012

Sticky Note Pad Teacher Gifts


Sticky note pad holders.  For this picture they are propped up against my white background.  When in use, they would sit on a desk or counter at a slight incline.

The sentiment which is from a retired stamp set says:
We make a living by what we get,
but we make a life by what we give.
Winston Churchill
 
Need a gift for your child's teacher, why not make some cute desk top sticky note pad holders.  If your children are out of school like mine, and don't need teacher gifts anymore, theses also make great gifts for coworkers and really anyone who uses a computer, sits at a desk, or has a busy household and is always looking for a piece of scrap paper when the phone rings, or any occasion when the pen is always missing and you just need to write something down.
 
To make the holders, I first purchased some clear photo frames from the dollar store.  These are the kind that have the little lip or ledge in the back (at least that is what I would call it) so when it is used for pictures the frame stands up.  To use it for the sticky notes, I keep the ledge at the top, this way the holder can sit on your desk instead.
 
I decorated them by cutting Designer Series Paper to fit the measurements of my frames.  I slid the paper inside the frame where there is an opening.  To keep it secure I placed a small piece of Sticky Strip at the top (this goes in the back of the holder).   The Sticky Strip can not be seen because I further decorated my holders with Embossed Card Stock.  I also added another piece of the DSP to the lip in the back. I then added my Sticky Notes by placing Sticky Strip on the back of the note pad and placing it directly onto the front of the clear frame.  Remember, my Designer Series Paper was slipped in behind the frame where the opening is so the note pad sits directly on top.  This way when the note pad is empty it will be easy to just replace it.  No paper to rip, just remove the last piece and put another pad on top.  I added my sentiment, sponged some ink around the edges and cut it out with my Big Shot and a Window Framaes Collection Framelit.  I secured this onto my cardstock with snail adhesive. 
 
I wasn't sure how I wanted to secure my pen, so I just tied coordinating ribbon around the entire holder to keep it in place. 
 
The following were used (current products listed only):
Designer Series Paper:  Twitterpated #125406, Birds of a Feather #126899
Cardstock:  Elegant Eggplant #126969, Baja Breeze #111352, Whisper White #100730
Ink:  Elegant Eggplant #126969, Baja Breeze #126960
Tools:  Big Shot #113439, Windows Frames Collection Framelits #129021 (Holiday Mini), Fancy Fan Embossing Folder #127751, Lacy Brocade Embossing Folder #127819 (Holiday Mini), Stamping Sponges #101610
Ribbon:  Elegant Eggplant 1/2" Scallop Dot #124143, Baja Breeze 1/2" Seam Binding #122331
Adhesive:  Sticky Strip #104294, Snail #104332
 

Thursday, October 4, 2012

Snowman Kisses


Snowman Kisses completed
 
Well, if it seems that I have been posting a lot of projects that are for Christmas and craft fairs, you are right. I am trying to stay ahead of the game before I have to make some shower invitations, and wedding favors for friends.  So, I hope you don't mind another holiday project that I thought was a lot of fun to make, and one that I know my grandchildren will really like too.
 
To help you make your own, I will try to include as many pictures and instructions as I think you will need.  I got help from so many different demonstrators who have also made these, and once again I have just changed things around a bit so I could use the stamp sets and colors I had in mind.  But special thanks to Heidi Boos who has a lot of great ideas on her blog as well and inspired me the most when I made my Snowman Kisses.
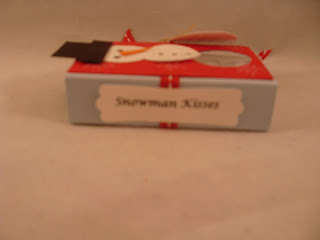
 
Side view.  Snowman Kisses punched out with Modern Label punch.
 
 
First, I cut Bashful Blue cardstock to measure 5" x 3" and scored at 2 1/4" and 2 3/4".  I then round the corners using the 3/16" corner punch.  Here you are looking at the back view.  Next, it is important to place your ribbon on before going any further.  I added two small pieces of sticky strip on each side to keep the ribbon in place.  Then I punched a circle using the 1" circle punch.  Just line this up where you want the bottom of your snowman to be.  This is where you will see the tic-tacs (kisses).
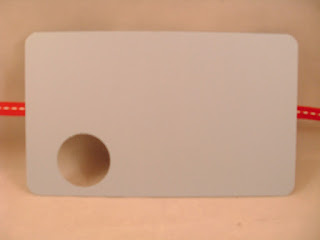
 
Inside view
 
After the ribon is in place, secure your tic tacs.  I used Sticky Strip to get a good hold.
 
 
Now you can tie it together, and add your front piece which measures 1 14/16" x 2 14/16".  I rounded these corners also, and punched my circle, lining it up with the bottom circle.  Now you can make your snowman.  I have seen several using a large stamped snowman, but since I didn't have that I made one using more 1" circles, and to make the hat I punched Basic Black cardstock with the 1" Square punch and Word Window punch, and trimmed them both down to get the look I wanted.  I used a black marker for the eyes and coal, and a sliver of Pumpkin Pie cardstock fo the carrot nose.


The saying I tied with Linen Thread to my Real Red ribbon goes as follows:
 
He's cute, cuddly, and full of good wishes.
He wants to give you these snowman kisses!
 
 
Now, some people prefer to have the saying on the inside of the holder, but I liked it on the outside, and it punched out nicely with the Extra-Large Oval Punch.  I thought it was nice that people could read it without opening it up.  Again, you can decorate and make your snowman anyway you want, but this worked for me.  In addition, I stamped some small snowflakes on my Real Red cardstock.  I thought it needed a bit of dressing up.  Have fun making your own, and I hope my instructions help, but if you need any more clarification just leave me a comment, or send me an e-mail and I will be happy to be of more assistance.
 
The following were used:
Cardstock:  Bashful Blue #105120, Whisper White #100730, Real Red #102482, Basic Black #121045
Ribbon: Real Red 1/4" Stitched #126875, Linen Thread #104199
Punches:  Modern Label #119849, 3/16" Corner #119871, 1" Circle #119868, Extra-Large Oval #119859, 1 " Square #124094, Word Window #119857
Adhesive:  Sticky Strip #104294, Snail #104332
Tools:  Simply Scored Scoring Tool #122334


Wednesday, October 3, 2012

Santa's Key


If you know a child that worries Santa won't make it to their house because they have no chimney, then this is the perfect gift for them.  Santa's Magic Key is a cute poem that goes like this:
 
You have no chimney
And do fear
Santa may not visit this year.
But there's a legend
We hope it's true
Of magic only Santa can do.
If you leave out
this special key
and whisper "Santa, I believe..."
His magic
will make the key fit right
and Santa will visit you
Christmas Eve  night!
 
This is not my original poem, and I have read several versions that are similar, and this is the one I liked best.  I thought the best way to display it was to first print it out using my computer and then cutting it with the Top Note Bigz Die.  I trimmed this layer down, so it would fit over another Real Red Top Note Die that I cut.  I stamped the small Santa in the corner, and attached my key.  To keep the key in place I put a glue dot in the front, and after I wrapped my silver cord around the back I secured it with a piece of scotch tape, and then to hide the tape, I cut a small piece of Real Red cardstock to cover it.  To package it, I placed it in a 4" x 6" Cellophane Bag, added some Real Red cardstock and Be of Good Cheer Designer Series Paper for the bag topper, and labeled it Santa's Key.
 
When I am making small items like this, I always try to find a cute way to package them.  I think if I just left it by itself, and didn't put it in the bag it wouldn't look as special.  Now, I can give them out myself as little presents, or have them on display at my craft fairs.   
 
The following were used:
Cardstock:  Whisper White #100730,  Real Red #102482
Designer Series Paper: Be of Good Cheer #126896
Stamp Set:  Jolly Bingo Bits #120857 wood or #121187 clear
Ink:  Real Red #126949
Tools:  Big Shot #113439, Top Note Bigz Die #113463
Punch:  Scallop Oval #119856
Packaging:  4" x 6" Cellophane Bags #102757


Tuesday, October 2, 2012


Original card for class
 
Alternate versions, using different stamp sets
 
 
I am having fun with the Triple Layer Stamping.  It is really easy to do, once you have the dimensions for your layers.  The top card is the original card I had prepared for my October stamp class.  I had left over materials, so once again I created three different cards, all with the same cut materials. 
 
The dimemsions I used are: 
Card base:  8 1/2" x 5 1/2" - (this will also be your 1st dark layer)
Additional dark layers:  4 1/2" x 3 1/4" and 3 1/2" x 2 1/4"
Lighter Layers - (the layers you stamp your images onto)  5 1/4" x 4", 4 1/4" x 3", 3 1/4" x 2"
 
Before you start stamping, take and center your three lighter layers together.  I used a removable adhesive to keep them together.  Now, stamp your images onto all three layers.
 
Remove your adhesive from these layers, and place them onto the coordinating darker layer.  Place all of your layers together onto your card base making sure to line up your stamped images.  Before I placed my two smaller layers onto my last larger layer, I tied on my ribbon.
 
Have fun experimenting with this technique.  It is really fun to see what you come up with once all of the layers are put together.
 
The following were used:
Cardstock:  Rich Razzleberry #115316, Whisper White #100730
Ink:  Rich Razzleberry #126850, Pumpkin Pie #126945, Old Olive #126953, Soft Suede #126978, Crumb Cake #126975, Always Artichoke #126972, So Saffron #126957
Stamp Sets:  Elements of Style #118611 wood or #120045 clear, Mixed Bunch #125535 wood or #125537 clear, Gently Falling #123802 wood or #123804 clear, By the Seashore #126530 wood or #126532 clear, Friendly Phrases #126149 wood or #126151 clear, Petite Pairs #122594 wood or #122497 clear, Thoughts & Prayers #113252 wood or #127805 clear, Word Play #120308 wood or #120651 clear
Ribbon:  Whisper White Baker's Twine #124262, Old Olive 1/8" Taffeta #119256,  Crumb Cake 1/2" Seam Binding #122332
Embellishment:  Neutrals Designer Buttons #119743